How to submit a pull request
Let’s say you wrote some code on the develop branch. You’re done with what you were working on, and you want to merge it to the master branch.
But you don’t know whether the code you’ve written is good enough. You want someone to review your code before you merge it into the master branch.
You can do that with a pull request
What is a pull request?
A pull request is short for “requesting for a Git Pull”.
This can be confusing to understand, so we’re going to explain it with an analogy.
Imagine you have a crate of bananas that you want to load onto a ship. The only way to load the bananas is:
- You get someone to throw down a rope
- You tie the rope to the crate
- They pull the crate up
When they pull the crate up, they’ll want to check whether your bananas are good. If they spot a rotten banana, they might want to request you change that rotten banana for a good one.
They might also think that all your bananas suck and decide to throw them away. (But let’s hope this doesn’t happen, shall we?)
In this analogy, the crate of bananas is your code from the develop branch. The ship is the master branch. The sailor is here to check whether your code is good enough for the master branch.
**That’s what a pull request is: You get someone to check your code before merging into another branch. **
The only difference between our analogy we used and an actual pull-request is: You don’t ask someone to throw a rope down for you. You bring the rope yourself, you tie it to your bananas at the harbour, and you throw it onto the ship. The only thing the sailor needs to do is check the bananas.
This is what we mean by submitting a pull request.
There are two ways to submit a pull request. How you do it depends on whether you have write access to the repository.
Submitting a pull request when you have write access
Before we submit a pull request, we need to make some changes, so we have something to merge. In this case, we’re going to add a heading to the code:
<!-- The code we're using to submit the pull request --><h2>I'm a heading</h2>You need to commit this code into the develop branch. Then, you need to push it to the git remote.
f It’ll appear in the section I highlighted in the image below.

If you see the message, great. Click on it. You’ll save a few steps.
If you don’t see it, you can click on the pull request tab at the top of your Github repo.

Then, click on the green button that says “new pull request”.

You’ll come to a page that says “Compare changes”.

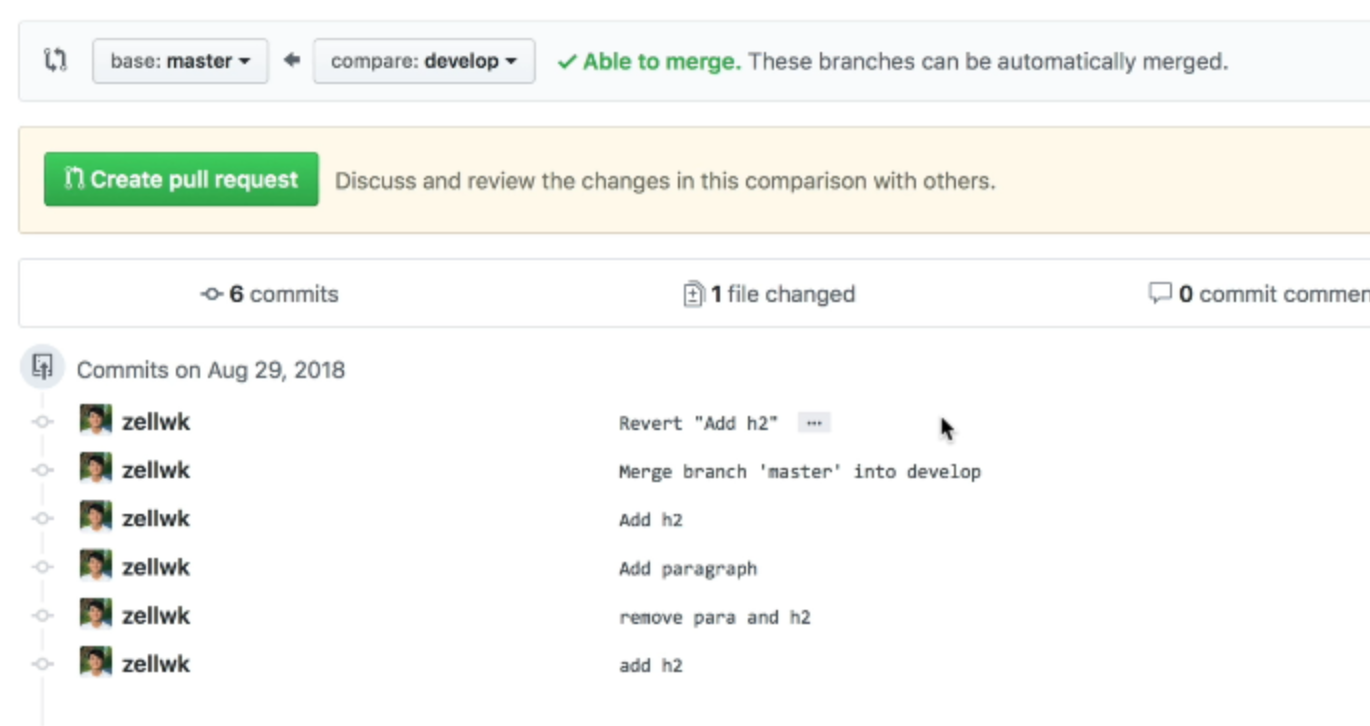
To create a pull request, you want to set the base and compare branches to the following:
base: branch you want to merge tocompare: branch you want to merge from
In our case, we want to merge to master, so we’ll set base to master. We’re merging from develop, so we’ll set compare to develop.
Once you’ve selected your branches, Github will show you the list of commits that have been made. Here’ what you need to do is click on the “Create pull request button”.
Github will show you a page that says “Open a pull request”.
Note: This is the page you’ll arrive at if you saw the “Your branch has been updated X minutes ago” message I talked about earlier.
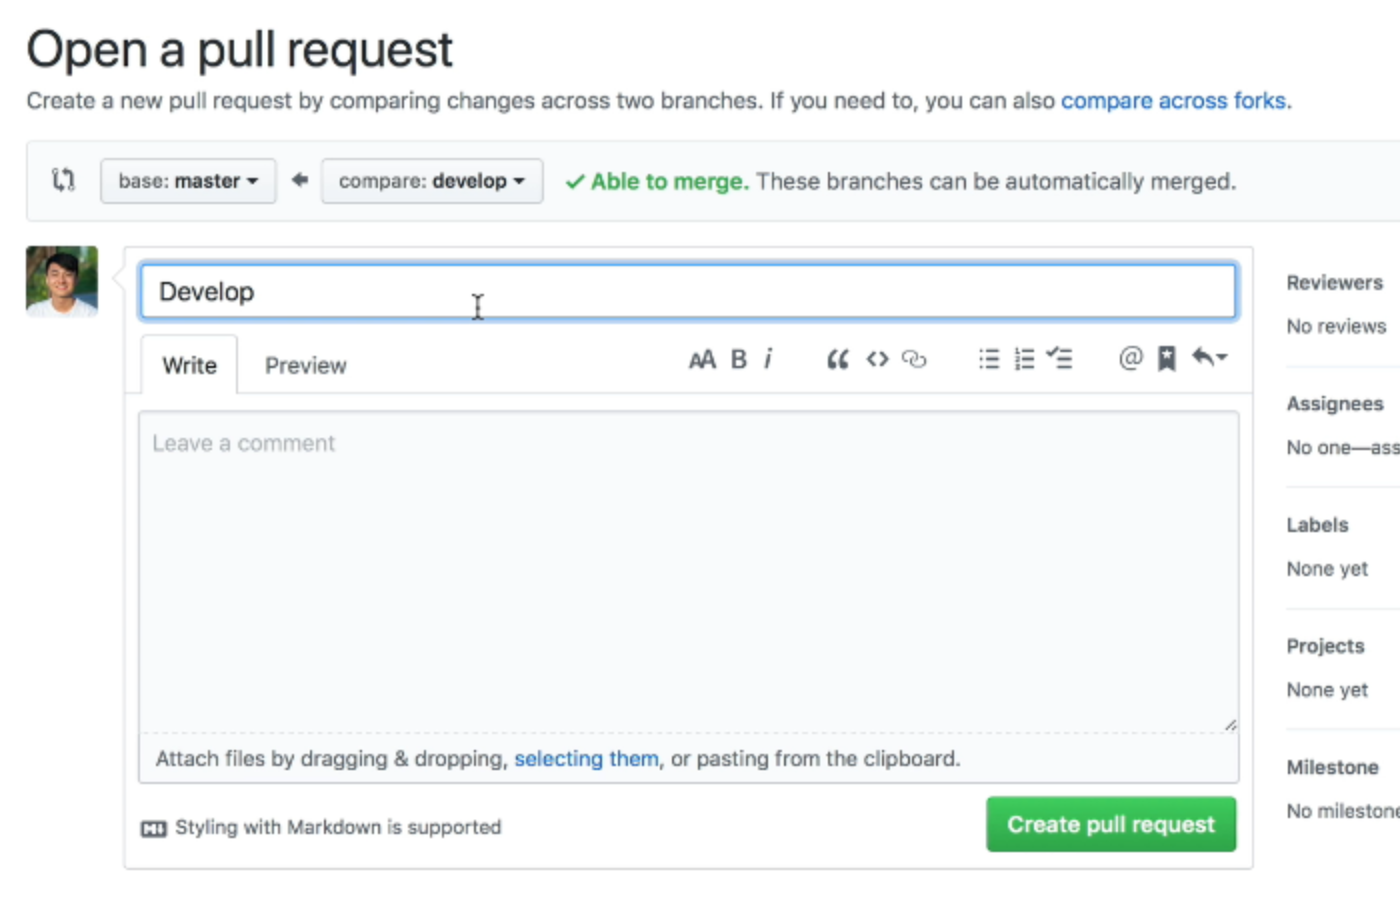
The title you write will be the title people see in the pull request tab. We’re going to set it to “Add a heading to the index”.
For the comments, it’s going to be the first message people see when they clicked into the pull request. In this case, we’ll say “I’ve added a heading. Let me know if its good?”.
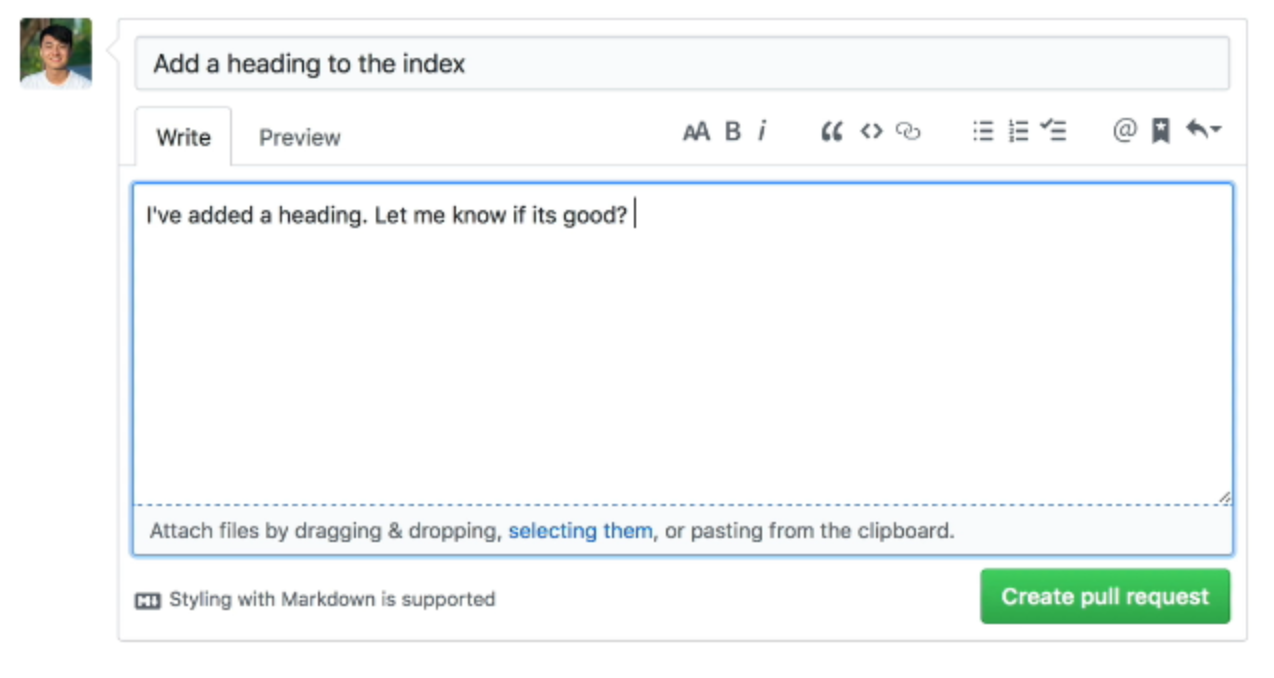
Once you’ve added the title and message, you can click on the Create pull request button at the bottom of the page.
Now, if you click on the pull request tab at the top, you’ll an open pull request that we’ve just submitted.

This is how you create a pull request if you have write access to the repository.
If you don’t have write access to a repository, you’ll have to create a Fork. Let’s pause and talk about what a Fork is.
What is a Fork?
A Fork is NOT the git client you’re using. Don’t get confused!
A fork in Git means a repository that is based off another repository.
You already learned about branches so far, and you know that a branch can be created from another branch. (Creating a develop branch from master, for example).
On the same note, a repository can be created from another repository. The repository that was created from another repository is called a fork.
The forked repository contains everything the main repository has (at the time it was forked). It includes all tags and branches.
You own the forked repository (which gives you write access). This forked repository will still be tracked to the main repository. You’re going to make a pull request through this tracked link.
Let’s see how it works in practice.
Submitting a pull request without write access
Note: You cannot fork your own repository. What I’m going to do is use a dummy account to show you how it works. From this point on, take note of these two account names:
- Main account:
zellwk - Dummy account:
zellwk2.
(I should have created a totally different name… but I think you’ll be able to follow along just fine).
To fork a repository, you click on the fork button that’s on the top-right-hand corner of the repository.

Once the fork is completed, you’ll see a repository that looks (almost) exactly like the repository you forked from. There is one difference though—if you look at the title of the project, you can see that the project is forked from another repository.
You have write access to this forked repository.

Here’s what we do when we submit a pull request from a forked repository:
- Create a new branch
- Write code in that new branch
- Send a pull request from that new branch
But for this lesson, I’m not going to create the new branch because I’ll have to set up the dummy account on my Git client. (Which is a tedious process).
So, for this lesson, we’re going to write in the develop branch directly. Then, we’ll submit a pull request from the develop branch.
In this case, I’m adding a list with the following HTML in the index.html file
<ul> <li>Item 1</li> <li>Item 2</li> <li>Item 3</li></ul>Note: I left the <ul> tag opened in this example. We’ll pick this error up when we review this pull request in the next lesson.
The commit message for this changes is: Add list.
Now, if you go back to your forked repository, you should be able to see a button called “new pull request”. This button is beside the button that lets you switch branches.

Click on this new pull request button to create a pull request.
Github will bring you to a page that says “Open a new pull request”. This page looks like the “Open a new pull request” page you saw above.
The difference is you need to set four things:
- The base fork
- The base branch
- The head fork
- The compare branch
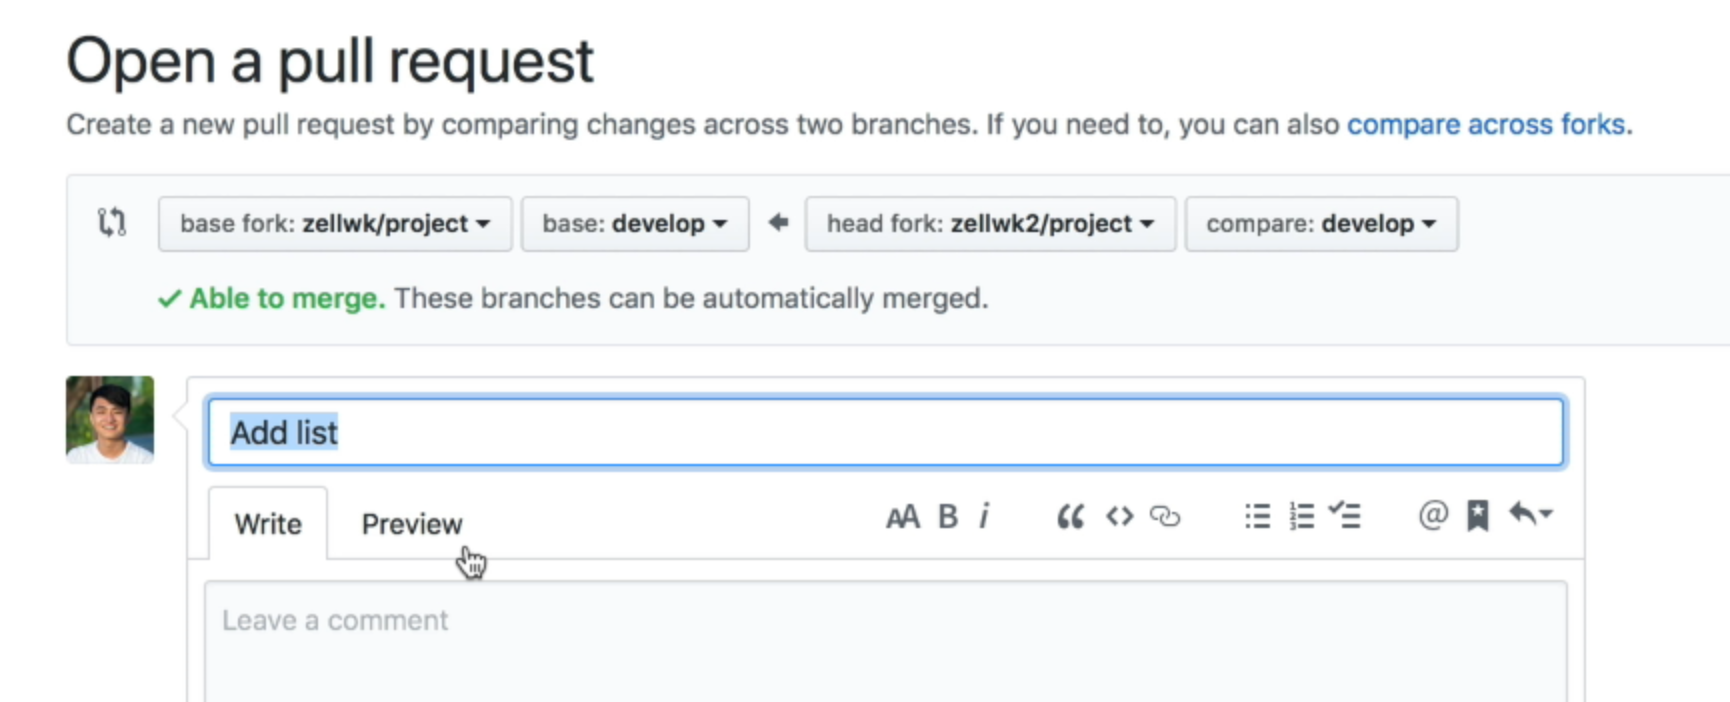
From the above example, we know two things:
- The
basebranch is branch you want to merge to - The
comparebranch is the branch you want to merge from
From the previous pull request example, we know the base branch is the branch you want to merge into, and the compare branch is the branch you want to merge from.
This means we should set the following:
- The base fork:
zellwk/project - The base branch:
master - The head fork:
zellwk2/project - The compare branch:
develop
What you need to do next is write the pull request title, write the comment, and click on the New Pull Request button.
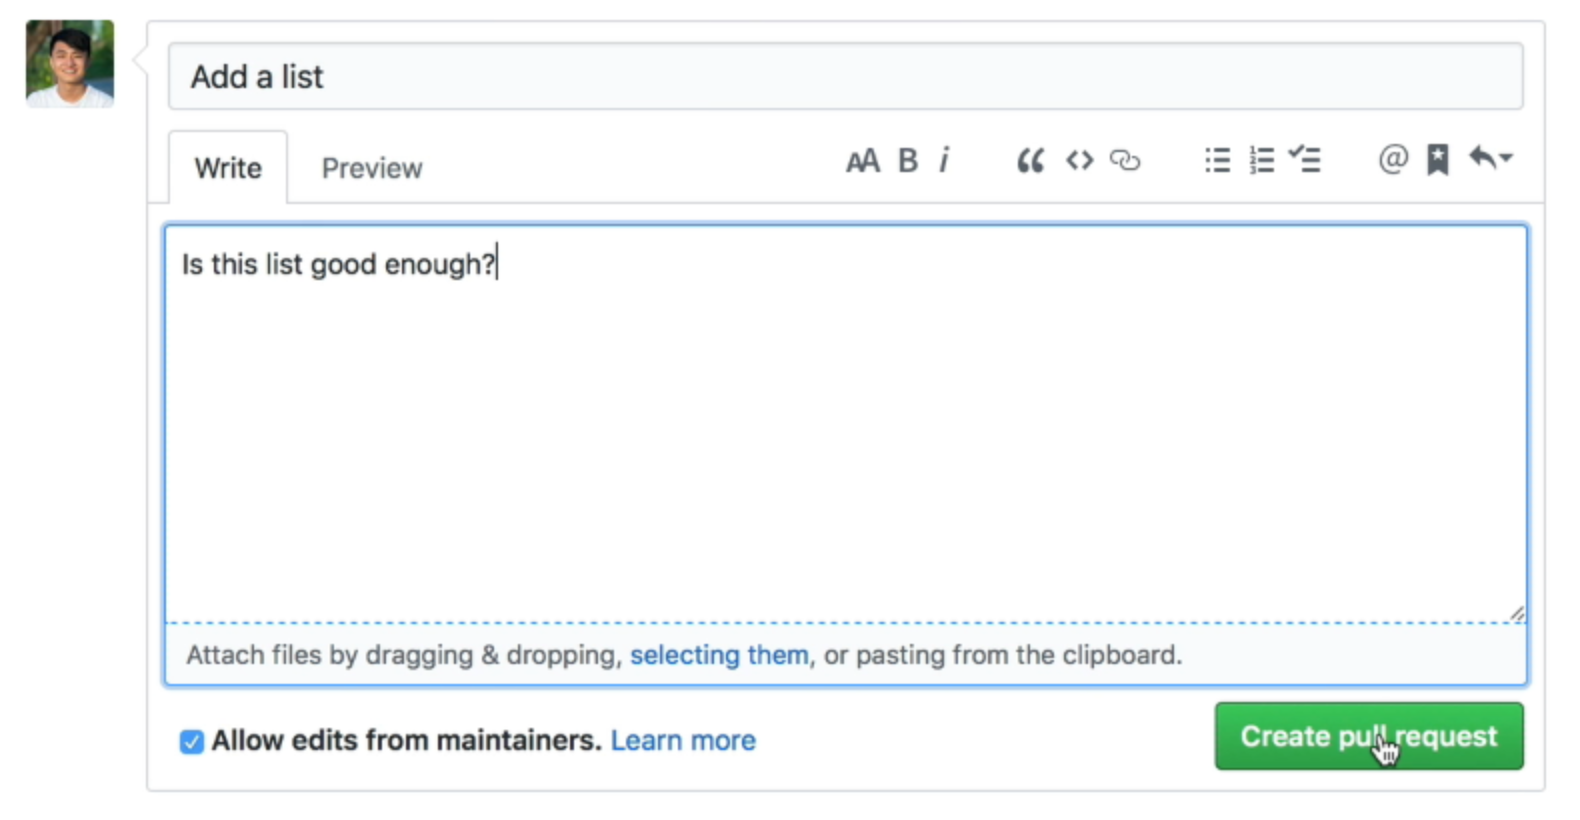
And you have submitted a pull request from a forked repository.
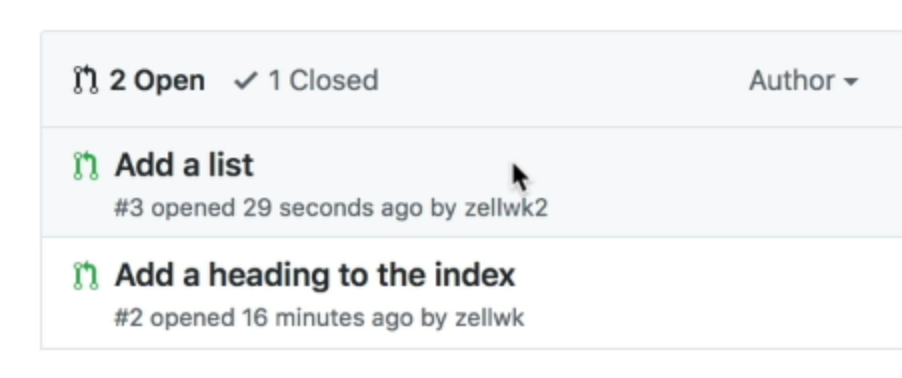
Wrapping up
When you submit a pull request, you ask someone to review your changes before merging them into a branch.
There are two ways to create a pull request. How you do it depends on whether you have write access to the repository.
If you have write access, you can create a pull request from the repository’s page.
If you don’t have write access, you need to fork the repository to your own page. Then, you create a pull request from your forked repository.
