A Complete Guide to @font-face
Custom fonts changes how typography looks on your website. Using the correct font can be a super big impact on how your website feels to visitors.
You will have to rely on the @font-face if you want to use a custom font that is not hosted in any webfont service.
In this post, I’ll share how to add your custom font to your website using the @font-face rule.
Along with it, I’ll also share how to make slight adjustments to the generated css properties so you can easily use them on your website.
Converting Your Typeface Into a Webfont
The first step to converting your typefaces is to make sure that you have the font file in either .otf or .ttf format. Feel free to check out Font Squirrel for some free fonts to use for this tutorial.
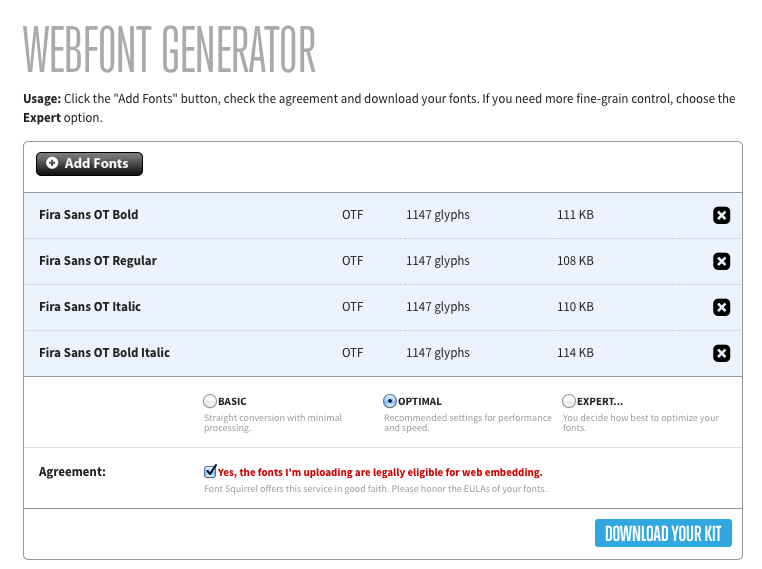
Once you get hold of your font, head over to the Font Squirrel Webfont Generator and upload your fonts into the generator.

I’ve used the Fira Sans Font for this tutorial. The weights that I’ve used are regular, regular italic, bold and bold italic.
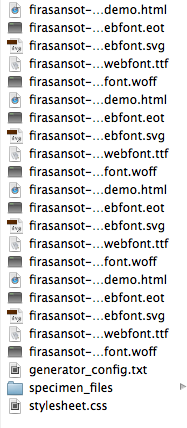
You should be able to download a webfont folder with the following items

This list may look daunting, but it really isn’t.
There is a need to convert every webfont you uploaded into 4 different formats: eot, woff, ttf and svg to make sure that it is usable for every browser. We had 4 fonts, hence 16 files. From here, you can remove all demo.html files, the speciment_files folder and the generator_config.txt.
Copy The Webfont Into Your Stylesheet
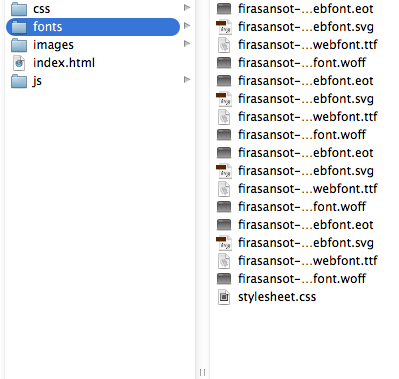
Typically, I place the fonts beside my css directory like this:

Open up the stylesheet.css file in the webfont folder and you should see 4 @font-face declarations that look somewhat like this.
@font-face { font-family: 'fira_sans_otbold'; src: url('firasansot-bold-webfont.eot'); src: url('firasansot-bold-webfont.eot?#iefix') format('embedded-opentype'), url('firasansot-bold-webfont.woff') format('woff'), url('firasansot-bold-webfont.ttf') format('truetype'), url('firasansot-bold-webfont.svg#fira_sans_otbold') format('svg'); font-weight: normal; font-style: normal;}Copy all the @font-face rules into your main css file delete the styles.css this generated style.css file.
Depending on where you have placed the font files, you might have to change the src property to point the css to the correct files. If you had opted to follow the structure I posted above, then you will have to add ../fonts/ at the start of all urls.
@font-face { font-family: 'fira_sans_otbold'; src: url('../fonts/firasansot-bold-webfont.eot'); src: url('../fonts/firasansot-bold-webfont.eot?#iefix') format('embedded-opentype'), url('../fonts/firasansot-bold-webfont.woff') format('woff'), url('../fonts/firasansot-bold-webfont.ttf') format('truetype'), url('../fonts/firasansot-bold-webfont.svg#fira_sans_otbold') format('svg'); font-weight: normal; font-style: normal;}Now, you should be able to use the fonts by using the font-family attribute. If you wanted to use the Fira Sans Bold in your website, you could have typed font-family: fira_sans_otbold.
We now have Fira Sans Regular, Fira Sans Regular Italic, Fira Sans Bold and Fira Sans Bold Italic. Wouldn’t it be much better if we can make it bold simply with font-weight: bold?
Let’s make some changes to do that.
Making These Webfonts Much Easier To Use
You may have noticed that there are two additional properties in the @font-face rule above. This is precisely what we’re going to use to make it easier to use the webfonts in the project.
/* Note: I have removed the urls for easier reading. They should still be in your css file. */@font-face {  font-family: 'Fira Sans';  font-weight: normal;  font-style: normal;}
@font-face {  font-family: 'Fira Sans';  font-weight: normal;  font-style: italic;}
@font-face {  font-family: 'Fira Sans';  font-weight: bold;  font-style: normal;}
@font-face {  font-family: 'Fira Sans';  font-weight: bold;  font-style: italic;}
The idea here is to convert all font-family properties into Fira Sans, and attach specific font weight and styles to it.
After adjusting the above, you should be able to use the different weights and styles just like you normally would.
body {  font-family: 'Fira Sans', sans-serif;}
p {  font-weight: normal;  font-style: normal;}
em {  font-style: italic;}
strong {  font-weight: bold;}
Anything wrapped in between <strong> and </strong> tags will now appear bold. Similarly, anything wrapped between <em> and </em> tags will now appear italicized.
Ending It Off
The @font-face rules gives you the flexibility to use very different typefaces for your website, and thats way awesome. But there is one thing you should take note.
When using @font-face, you should try to only include fonts you need since they can slow down page load speeds dramatically. Whenever possible, try to use fonts hosted on CDN services like Google Webfonts and Typekit instead of using @font-face to host your own fonts.
