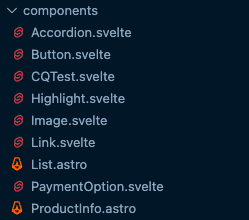
How camel-cased classes are way better than kebab-cased classes
I found a better way to write classes as I dove into my latest project. This approach is much better than BEM and I’m excited to share it with you today.
Long story short: The better way is to use write classes in a camel-cased syntax.
Now, hear me out before you label me as a JavaScript dude who’s trying to make CSS more like JavaScript:
- I started my career more as a CSS guy than a JavaScript guy.
- I love CSS and I have no intention to deface CSS, so I’m not coming from a point where CSS sucks.
- I simply love to improve systems and this is one way I’m improving the systems that I use.
I’m just sharing this with you today because I truly feel that camel-cased classes are better than the traditional kebab-cased classes — especially when you’re trying to write modular CSS.
I’ll explain why in this article so sit back, relax, and let’s dive in.
We’re going to go straight into the meat of things, so let’s begin by talking about the method we’ve been using for the longest time ever — Block, Element, Modifier (BEM).
The Traditional BEM
BEM stands for Block, Element, Modifier.
- Block is the name of the component itself
- Elements are children inside the component
- Modifiers can be used to modify the base styles we give the block or element.
If you’re new to BEM, here’s an article that will bring you up to speed.
Traditionally, BEM is written in the following format:
- Block: The component is written in kebab case like:
block - Element: The block, followed by two underscores, then the element:
block__element - Modifier: The block or element, followed by two dashes, then the modifier:
block--modifierorblock__element--modifier
It looks like this when used in the CSS:
.block { } /* The component */.block__element { } /* Children */.block--modifier { } /* Modifying a block */.block__element--modifier { } /* Modifying an element */When used in HTML, it can look something like this:
<div class="block"> <div class="block__element">...</div> <div class="block__element2">...</div></div>Now, the BEM has been an exceptional system because it gives us rules that ensure we don’t style another component’s elements and modifiers by mistake… which keeps developers sane when they’re handling large CSS code bases.
But BEM is a system that was created a long time ago and it doesn’t use any of the common practices that we use today, so it’s time for us to switch to a better system.
One example of a common practice today is the utility classes (which became super popular thanks to Tailwind’s influence).
If you tried using utility classes on a BEM project, you’ll notice that it doesn’t fit into the BEM paradigm at all… that’s because BEM wasn’t designed to be extendable.
For example, the best way to add utility classes to BEM, without breaking BEM’s convention, is to add a u- prefix before the block, element, or modifier. This is an approach called namespacing.
/* Utility class, assuming that block is the name of the utility */.u-block {}If we extend the concept of namespacing further, we can also have other namespaces such as atoms and molecules in Brad Frost’s Atomic Design System. If you were to implement the Atomic Design System, you could use a- for atoms andm- for molecules.
I wrote more about this in a namespacing article.
/* Namespacing with Atomic Design System */.a-block {}.m-block {}BEM has been a wonderful system as you can see.
The only sucky thing about BEM is that elements and modifiers can get messy and ugly very quickly.
Here’s an example that you’ll often find in practice:
<div class="block block--modifier"> <div class="block__element">...</div> <div class="block__element2 block__element2--modifier">...</div></div>If you feel that this HTML code is hard to read and understand, you’re not alone. I feel the same way too. This is why I have been searching for a better alternative for years.
And I’m excited to have found a much better CSS naming system.
For simplicity, I’m going to call it CamelCSS.
Let me share it with you right now.
CamelCSS
CamelCSS uses the same block, element, and modifier concept as BEM. But we’re going to write them differently.
- Block: We use pascal case for the block, like
Block. (Pascal case is just camel case that begins with a capital letter). - Element: We write elements in camel case, like
element - Modifier: We write modifiers with an
mprefix, like:.mModifier
.Block {} /* The component */.element {} /* Children */.mModifier {} /* Modifying a block or element */This doesn’t look like anything special at first glance, but CamelCSS has HUGE benefits.
Here are some of them:
- The block looks like components in major frameworks
- It’s much more readable
- It’s super extendable
- We can compose classes
- Naming components becomes infinitely easier
We’re going to explore these five benefits together.
Benefit 1: Blocks look like Components in major frameworks
If you build components with Svelte, Vue, or React, you would know that we typically write the component’s file name in PascalCase.

The new BEM syntax simply follows the PascalCase convention for blocks because we don’t have to translate the component between PascalCase and kebab-case.
When we don’t have to translate the component between PascalCase and kebab-case, we use less energy. And we can use this energy to focus on things that matter more, like making a great site and writing great code.
Benefit 2: It’s much more readable
We’ll go through a real example and you’ll see why CamelCSS is much better than BEM — especially when using namespaces.
I want you to glance at the code below and ask yourself this question: Which one is easier to read and understand?
<!-- Traditional BEM --><h2 class="u-text-center u-center">Some Text Here</h2>
<!-- CamelCSS --><h2 class="uTextCenter uCenter">Some Text Here</h2>
If you followed the instructions above and glanced at the code, you’ll notice that CamelCSS is much easier to understand compared to the BEM alternative.
That’s because: we can immediately tell that there are two classes in the CamelCSS example. (But BEM seems to have 4-5 things until you inspect it closely).
This happens because we subconsciously relate dashes, underscores, and spaces as separators of some sort. So u-text-center seem to be three separate things while uTextCenter is obviously one thing.
This is why CamelCSS is much more readable than traditional kebab-cased classes.
Benefit 3: CamelCSS is super extendable
I showed you how to add utility classes in the example above and it feels completely natural.
This means CamelCSS is extendable and we can extend the system to include other types of classes.
Here are some examples I’ve been toying with:
- Icons: prefix with
i - Typography classes: prefix with
t - Containers: Add a
Containersuffix
.iStar {} /* Icon class*/.tStylish {} /* Typography class */.BlockContainer {} /* Container class */Container classes are extremely useful when they’re used with Container Queries! It’s one of the biggest best practices I discovered while playing around with it. I’ll talk more about what I discovered about Container Queries in a later post.
For today, let’s focus on CamelCSS.
Benefit 4: We can compose classes with CamelCSS
This is the biggest benefit of CamelCSS.
Composing classes means we can add multiple classes onto a single element. The above utility example is a simple form of class composition.
<h2 class="uTextCenter uCenter">Some Text Here</h2>Now we can take this a step further and compose Blocks and Modifiers together on a single element.
<div class="Block mModifier">...</div>This is HUGE because we can write Block and mModifier separately in the CSS.
Here’s how the CSS should be written.
.Block { } /* Block */.Block.mModifier { } /* Modifier */It’s important to stack the mModifier class onto .Block when writing the CSS because of two reasons:
- Modifiers don’t make sense on their own so they should always accompany what they’re modifying. So when we stack
mModifierontoBlock, we open up theModifiername to be used on other Blocks. - The increased specificity ensures CSS in
.mModifierwill always overwrite the CSS in.Block, so we don’t have to worry about the order of classes written in the CSS.
Let me give you a real example of how this can be used.
In this example, I have a BasicGrid block. As its name suggests, this creates a Basic Grid layout (which I used a lot for Magical Dev School’s website).
Then, I have three modifiers:
mOneColumn: This denotes a one-column grid.mTwoColumns: This denotes a two-column grid.mGapWide: This increases the gap between items in a two-column grid.
Here’s how I used these three modifiers.
<div class="BasicGrid mOneColumn"></div><div class="BasicGrid mTwoColumns"></div><div class="BasicGrid mTwoColumns mGapWide"></div>Isn’t this HTML beautiful? It’s so readable and easy to understand, it’s like a work of art!
Now the CSS would look like this:
.BasicGrid {/* ... */}
/* Column modifiers */.BasicGrid.mOneColumn {/* ... */}.BasicGrid.mTwoColumns {/* ... */}
/* Gap modifiers */.BasicGrid.mGapWide {/* ... */}
I think this CSS is very easy to understand too.
At this point it makes sense to talk about styling elements in CamelCSS… we’ll get to this soon, I promise!
We’ll finish up with the last benefit before we get there.
Benefit 5: It’s much easier to name components with CamelCSS
Naming in BEM is hard because we have to be creative to find single-word names for the blocks. That’s because double-worded names will be… unbearable to look at…
Now if you extend this thought further, you’ll also notice that naming anything in CSS is hard because of the same reason — we tried to use single-word names for almost every class we can!
This is why developers often complain that naming is hard in CSS.
And this just reinforces the point I made earlier that dashes are separators in our subconscious…
So when you change to CamelCSS, you’ll notice that naming suddenly becomes not an issue anymore — that’s because we can use two-word or even three-word names.
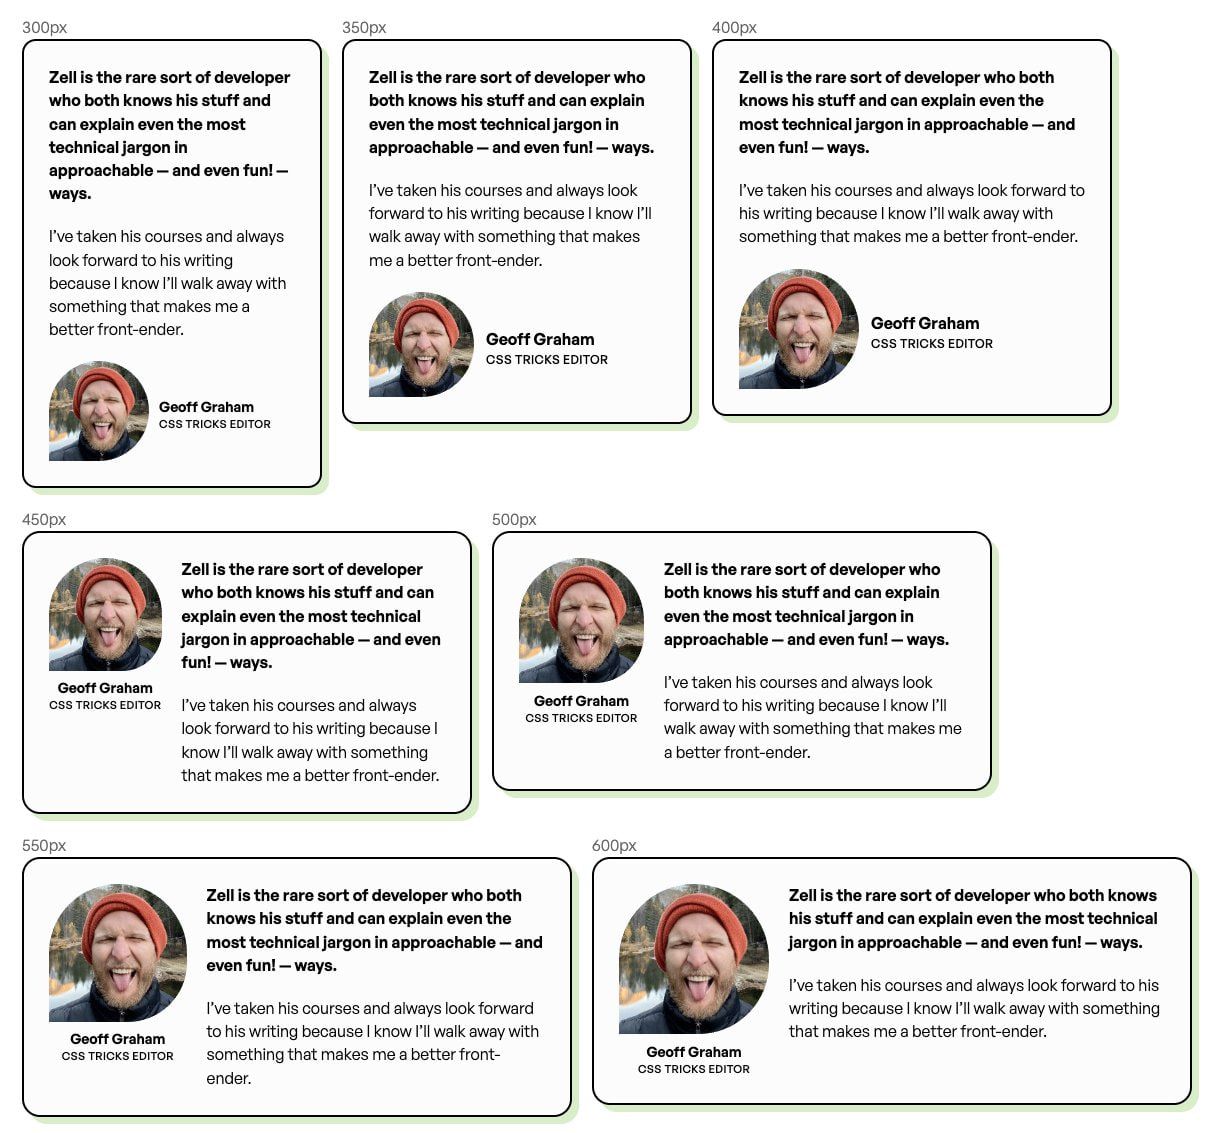
Just the other day, I built a component that allows me to test container query styles. Here’s what it looks like:

If you think about how you’d name this component in BEM… I’m sure you’ll have a hard time coming up with a good name.
But if you use CamelCSS, naming becomes super simple. I simply named it CQTest and called it a day. If I want to be more verbose, I could always call it ContainerQueriesTest when I have to use this with other developers.
So this proves my point that naming is much easier with CamelCSS than the traditional kebab-cased classes.
We’re done with the benefits now. I promised you earlier that I’m going to talk about styling elements in CamelCSS so let’s get to it.
Styling Elements in CamelCSS
When we style elements, we want to use the direct descendant selector whenever we can.
.Block > .element { /* ... */ }Here’s a quick example. In this case, Block and AnotherBlock both have a content element.
<div class="Block"> <div class="content"> <div class="AnotherBlock"> <div class="content">...</div> </div> </div></div>Now this is a contrived example but I’m sure you know where I’m coming from.
There are two reasons why we want to use direct descendant selectors.
- Using
.Block > .contentprevents.Block .content .contentfrom being styled by mistake. - We free up the
elementname (contentin this case) for other Blocks which may have the same element.
Wrapping Up
That’s all, folks.
I believe CamelCSS is a much better way to write CSS. The benefits I outlined in this article are:
- The block looks like components in major frameworks
- CamelCSS is much more readable
- CamelCSS super extendable
- CamelCSS is composable
- Naming with CamelCSS because infinitely easier
What do you think of CamelCSS? Do you want me to expand more on this concept?
I’d love to hear your thoughts, so let me know on Twitter or through email!
