Your first Git commit
Note: This the second video in the Git for beginners series. Watch the first video here.
Today we’re going to talk about how to make your first Git commit.
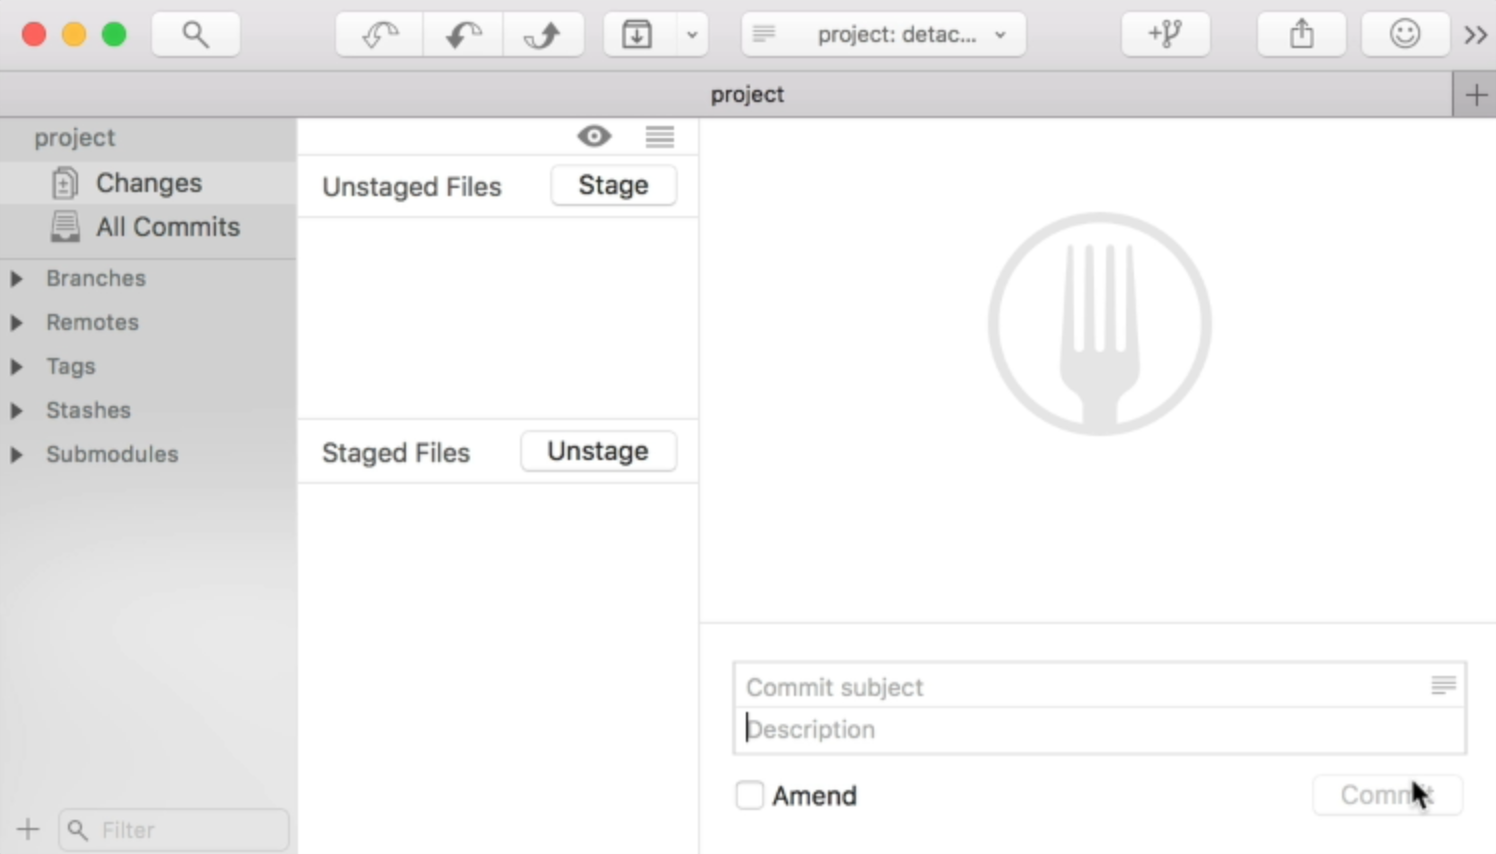
If you open up Fork from where we left off previously, you’ll see the project screen. If you click on changes, the screen will split into two parts.
On the left of the screen, you’ll see a section that says unstaged files. Below this section, you’ll see another another section that says staged files.
To the right, you’ll see a placeholder that shows Fork’s icon. At the bottom, you’ll see a few fields:
- A commit message field
- A description field
- An ammend checkbox
- A commit button
This place is called the staging area. This is where you decide what files you want to save into Git.
Staging a file
Before you save anything, you need to make a change in the Git repository.
Open up your Git project in a text editor like VS Code. Create a file called index.html and give it some HTML to start with.
Once you save this file, you’ll see this file in the staging area. It should appear in the unstaged files section of the staging area.
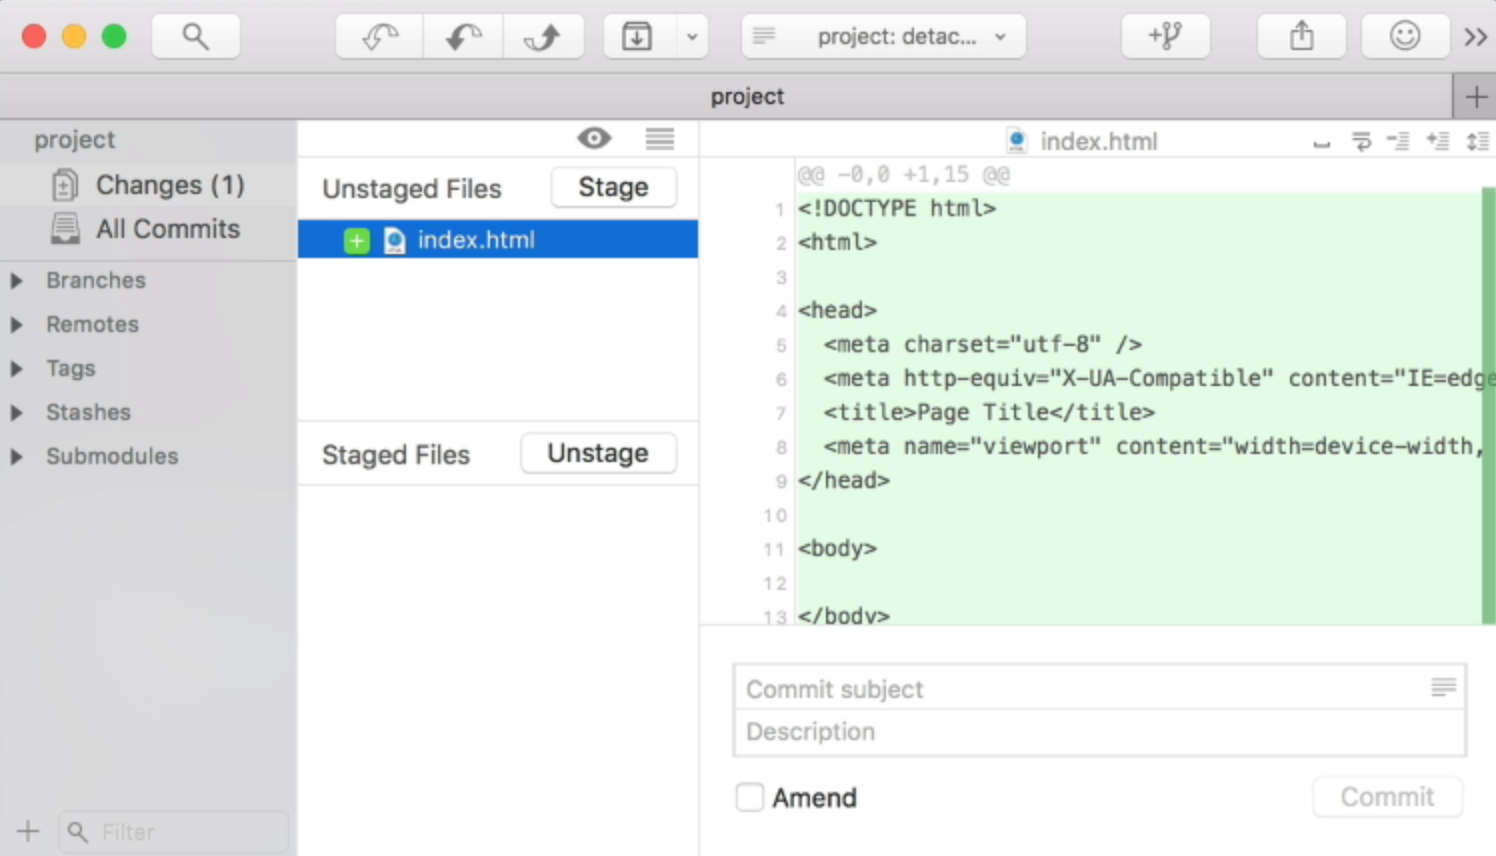
An unstaged file is a file that has been changed since you last committed into the Git repository.
If you want to commit a file (in this case, the index.html file), you can click on the file and click on stage. This file will be moved from the unstaged files section into the staged files section.
When you have a file in the staged file section, what you’re saying is you want to save that file when you make a commit.
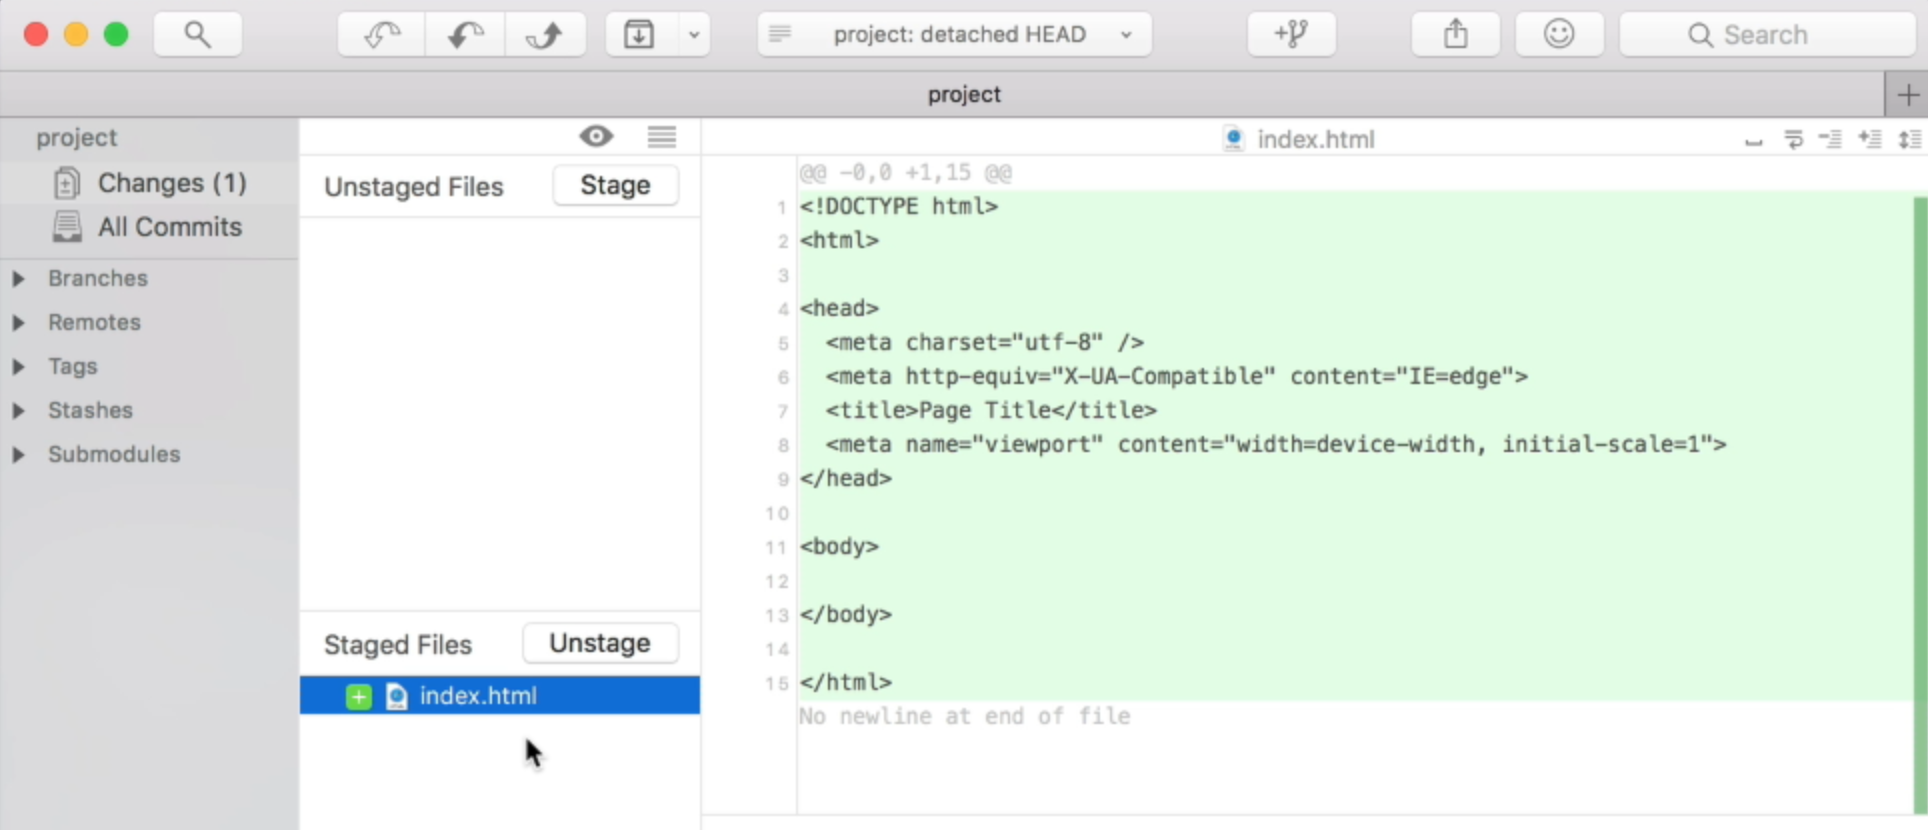
If you click on the file, you’ll see the lines of code (in green) that will be saved into the repository.
Creating a commit
To create a commit, you write your commit message at the bottom right corner, then click the “create commit” button.

Once you click on the commit button, the staged files will disappear from the staging area. This is because the files are saved; there are no more new changes for the file in the repository.
Committing more than one file
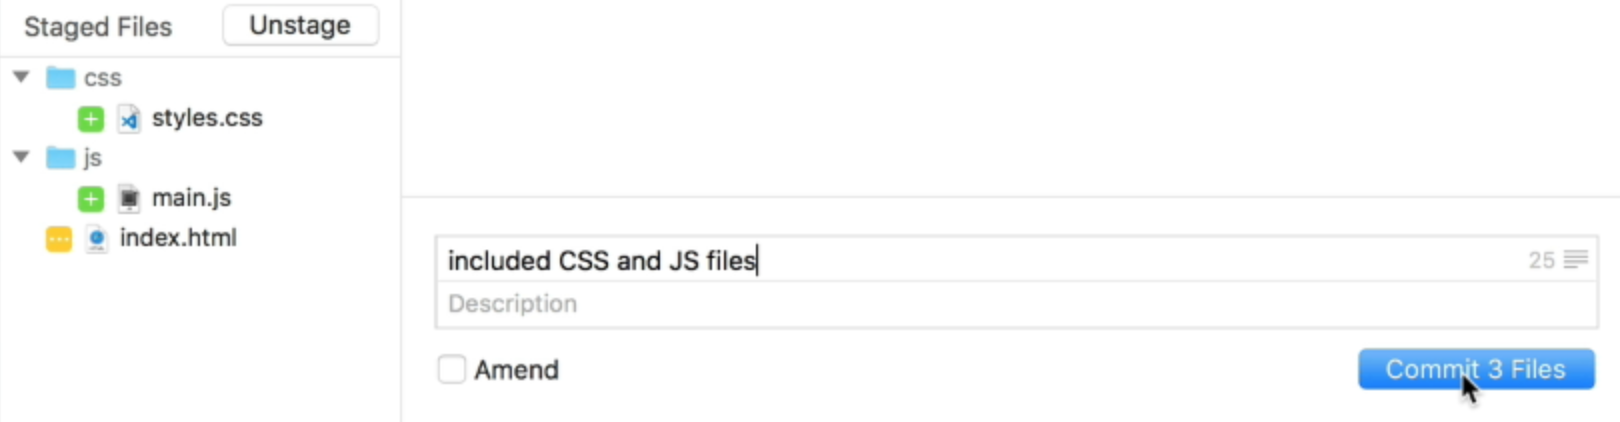
You can commit many files at the same time. To do so, you need to change many files.
In this example, I added a CSS file and a JavaScript file to the repository. I also added code to the index.html file to point to the CSS and JavaScript files.
If you go back into Fork now, you should see the folders and files that are changed.
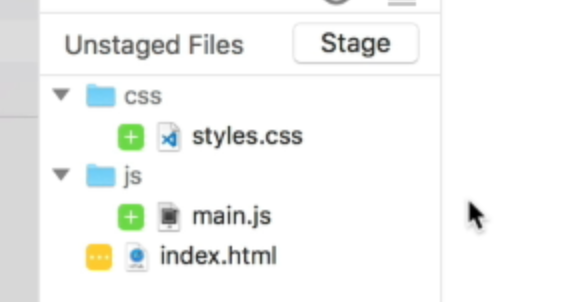
To commit all three files at once, you select the files and click the stage button. Then, you write your commit message and commit the files.
Checking the Git History
If you click on All Commits in the sidebar, you’ll see the commits you have made so far. In some Git clients, this is called Git History.
Exercise
Try to make a few commits into your Git repository with Fork. In the next video, I’ll show you how to push to a git remote and how to pull from a git remote.