Wordpress 101 – 5 critical things you need to know to use Wordpress effectively.
People who have used Wordpress for ages all say that it is extremely to use. Those who are new to wordpress, however, dont usually think that way when they first set their eyes on the backend.
I felt the same way when I first started with Wordpress. Stuff just gets easier and easier to do overtime and I learnt more becoming a theme developer.
In this post, I’ll like to share with you the very basics of setting up a wordpress, and talk about 5 critical things you need to know to use Wordpress.
After knowing these, the things such as changing your navigation menu and creating a post would be a walk in the park.
Let’s jump into this real quick.
The five items I’m going to share with you today are:
- Install a Wordpress Theme
- Customize your Logo and Tagline
- Upload Pictures, Videos and other files
- Create Posts or Pages
- Create a navigation menu
1. Install a Wordpress Theme
You are going to need to know how to do this unless your designer or developer is going to do it for you (Or you if like to stick with the default Wordpress theme).
To change a theme or install a new wordpress theme, go into Appearance > Themes as shown in the picture.

If your theme has already been installed, you can click onto Activate Theme to start using it.
Otherwise, click onto the install themes tab and select upload. Note that your theme must be in a zip format. If you like to browse other free themes, you can also do so in the install theme screen.
Be sure to activate your theme after installing it!
2. Customize your Site Title and Tagline
The most cruicial part about creating your website for the first time is to customize your website logo, site title and tagline. A site title to a website is akin to a name for a shop, afterall, you will want to name your own creations.
The site title or tagline would be the most important things for people to find your website online. Behind the scenes, **most wordpress themes will tell Google to look at the site title or tagline to tell people that you’re here. **
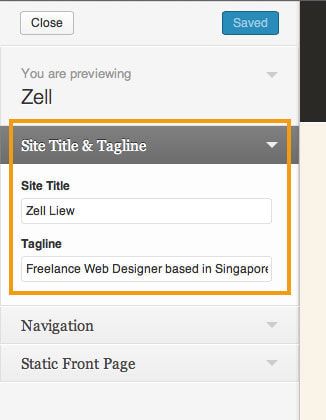
To change the site title or tagline, go into Appearance > Customize as shown in the picture. You can then customize your site title and tagline by changing them in the left hand column.

3. Upload Pictures, Videos and other files
If you want to show pictures and videos, or even allow your users to download files, “media” is your friend.
To upload a file, open up Media > Add New and drag your files into the uploader.
The library contains all files you have previously uploaded and you can find them easily by heading into Media > Library.

4. Create Posts or Pages
I’m going to spend a little more time in creating posts or pages because this is where most wordpress users find it the most confusing. I’ll first walk you through the text editor, followed by inserting media (images, videos or PDFs) into your post, and finally publishing it.
Text editor area
Let me first touch on the text editor area and talk about some important icons where you will need to know, beginning with the most basic ones and ending with the most important ones.
In the text editor area, if you are not trained in HTML, make sure you click the visual mode at the top right corner
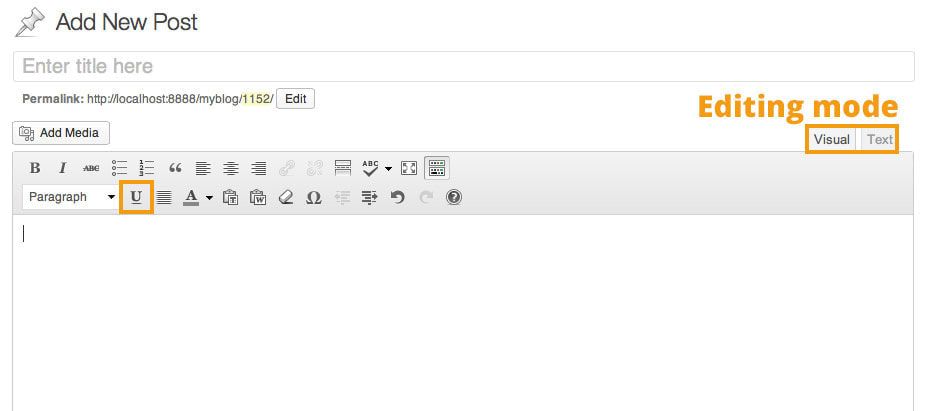
Once you are in this mode, the following applies.
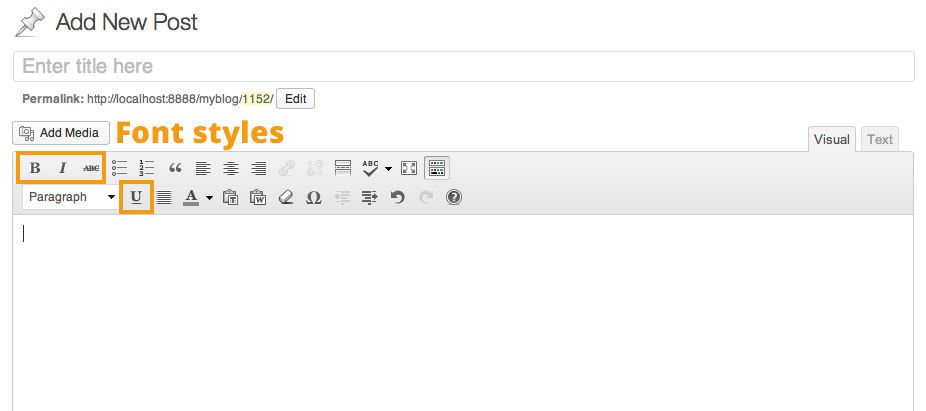
Text styles – turn text to bold, italic, underline or strikethrough
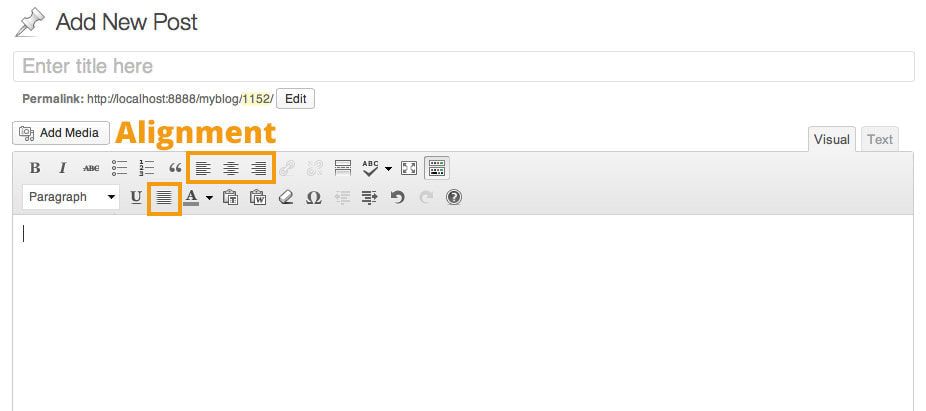
Text Alignment – Set alignment to left, middle, right ot justify. If left untouched, text will default to left alignment.
Bullet, Numbered list – Set selected text into a bullet or numbered list.
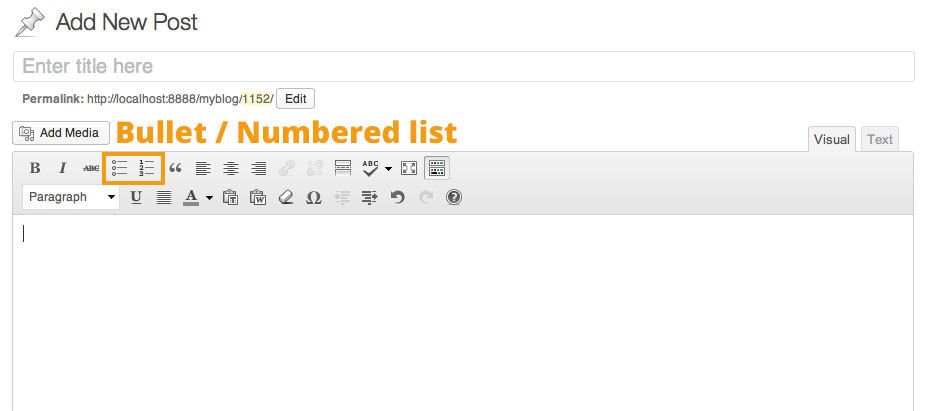
Everything up till here is similar to Microsoft Word and I’m sure you know what they do. You might not have seen the upcoming items before and I will accompany them with some quick explanation.
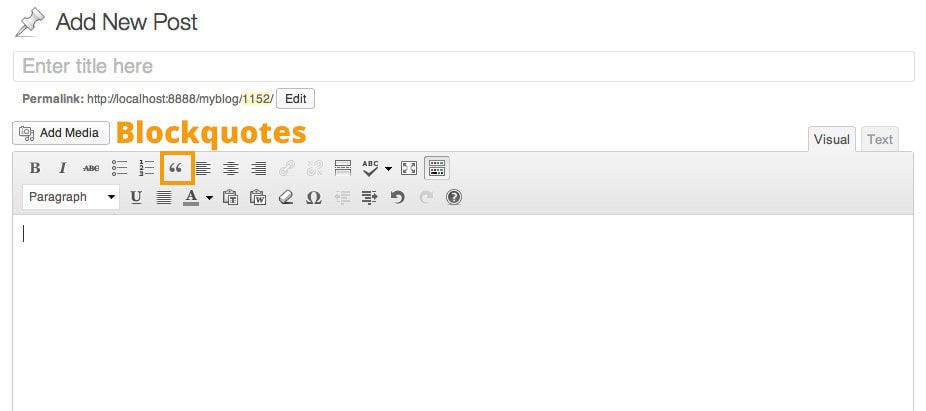
Blockquotes – Sets selected text into a blockquote style. This is very useful if you are quoting someone, or would like to emphasize a point.
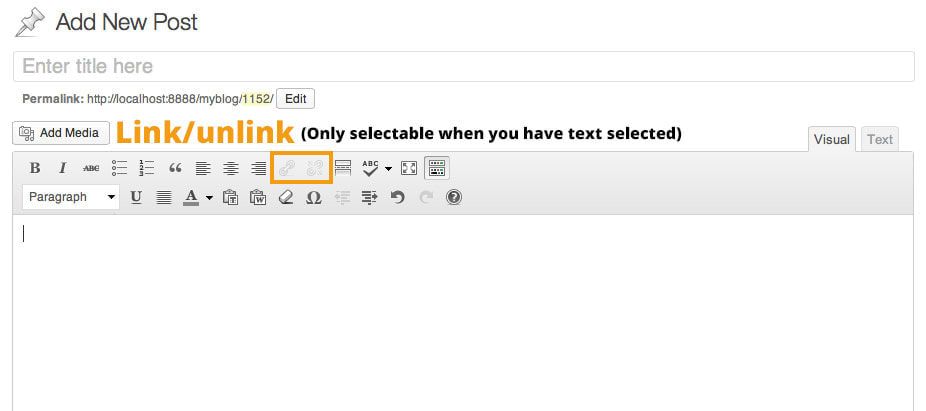
Link Tags – These two buttons allow you to add/remove a link to/from another website. This allows you to link to another website and the reader gets redirected to the linked area. You can even link to your own posts!
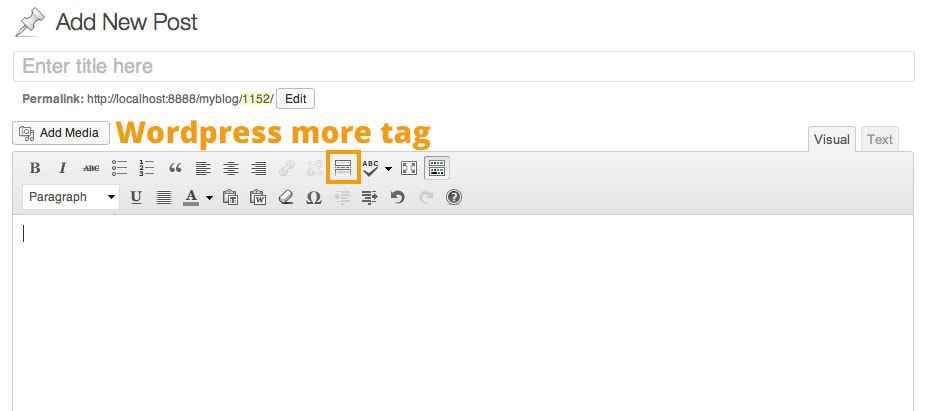
Wordpress More Tag – This is the tag to use if you like to limit the words should in your blogroll page. As an example, if you use the more tag after the first paragraph, people viewing your blog page will only be able to see the paragraphs above the more tag (The first paragraph in this case). If you like to view the article, the will have to click into the article.
Setting up Wordpress more tag is definitely a good habit to get into.
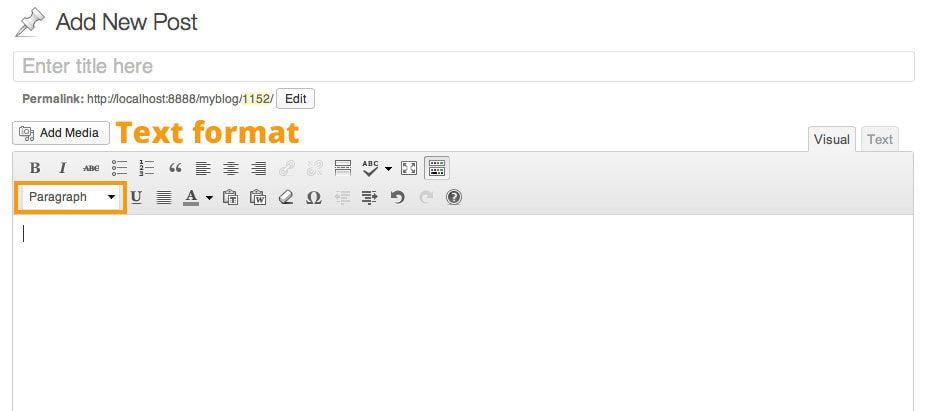
Text Format – The text format switch is easily the most important item. This allows Wordpress to know which words are supposed to be a subheading (heading 2 for most wordpress themes) and which words are body text (paragraph).
Do remember to set your text format to help your readers have an easier time as they read through your articles. Allow room for subheadings by remembering to switch them to Heading 2.
For HTML users, if you are comfortable with writing in HTML, feel free to use HTML in the HTML mode. I would actually recommend using HTML because you will be able to control your document much more thoroughly than compared to using the visual mode.
Using media
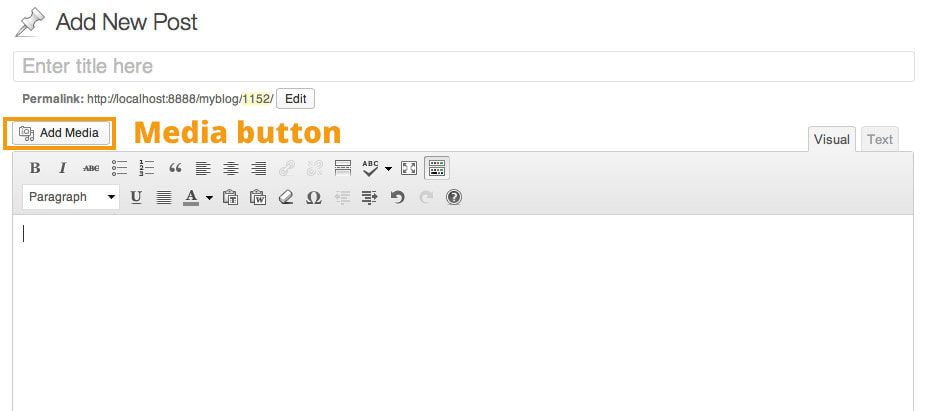
To use media in your post or page, click on the media button, select your media, change any settings if necessary and click on insert to post.
Media settings are applicable only to images and the explanation are as follows:
Title – Title of media Caption – Small text you would like the image to be accompanied with. Used to provide further context Alt text – Alternate text to display if image cannot be shown (Always remember to set this, for SEO purposes!) Descrption – Description of the image if you would like to include it (optional) Alignment – Option to align image to the left, right or middle. Link To – Sets the location for which the media should link to (I leave this option as none for most images in my blog post) Size – Size of the image to be displayed
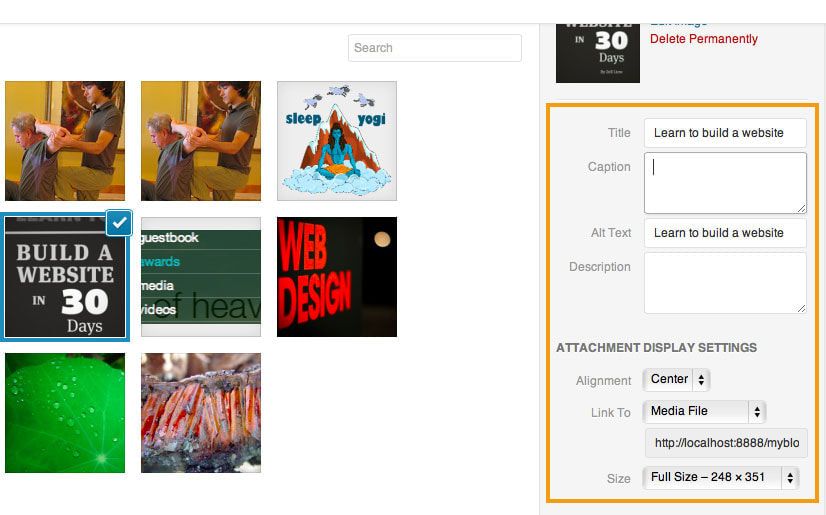
The important things you have to configure are “title”, “alt text”, “alignment”, “link to” and “size”.
Publishing or scheduling a post/page
There are a few options you can do over at the publish panel within the editing page you are currently on.
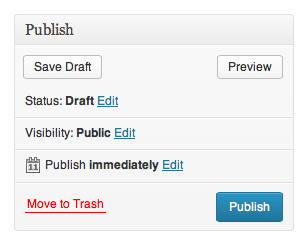
Preview – allows you to preview the page without publishing it. You can have a look firsthand how this post will look like before throwing it out there
Save Draft – allows you to save the work to come back and edit at a later date
Publish – lets you publish the work when you click on the publish button. You can edit the publish times and schedule the post to make wordpress post at a later time instead if you like to.
5. Adding a navigation menu
Finally, the navigation menu is the website menu where you see things like home, blog, contact etc. Once you have created some awesome content, you will want people to be able to find them in your website menu.
The page to create/edit navigation menu is located under Appearance > Menu.
Creating the menu
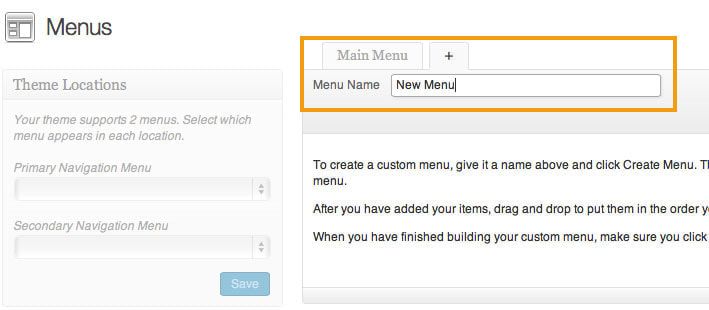
To create a menu, you first have to click the plus sign as shown in the picture and give it a name. I’ve created a menu called new menu as an example.
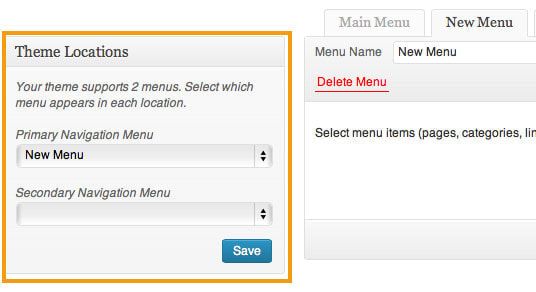
Next, you have to add the menu you have created to your theme, located under the theme locations tab. Select your primary navigation and add the menu you have created into it. Hit Save and we can proceed to add items into it.
Adding items to the menu
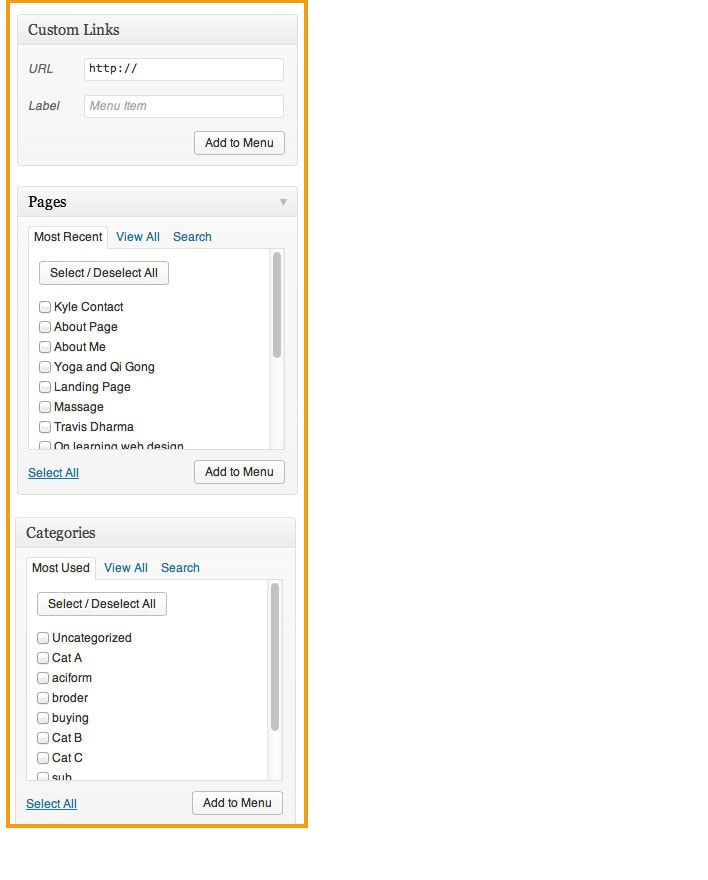
There are 3 ways to add to the menu, and they are located under theme locations.
Custom Links – Allows you to add custom links to the menu. This option allows you to link away from your website into other websites. This option is rarely used, but if you want one item in your navigation menu to link to another website, enter the website url here.
Pages – Allows you to insert any page you have created into the menu. Pages are the most common items you’ll find in menus and things like blog, contact, about pages go here.
Categories – Categories are like blog pages, but they allow you to display groups of posts for specifically for that category.
Summing it all up.
Thats it, these are the 5 critical things you will need to know to make wordpress work for you. I bet you’ll be able to do create a post and/or page effortlessly without having to refer to my post after you’ve done it once or twice.
Hope this helps if you are just starting out with Wordpress, and feel free to ask any questions or let me know if you want me to cover something in the comments!
