Collecting Payments with Stripe while using Astro
In this article, you’re going to learn how to collect payments with Stripe on Astro.
To preface this article, we’re not doing anything new here. Stripe already has good guides that show you how to collect payments with HTML + Vanilla JS, Next JS and React. We’re simply going to adjust the instructions from these guides to fit how I would use Stripe on Astro.
In the process, you’ll learn to use advanced Astro features like Server-Side Rendering and Environment Variables.
You will also learn what you need to know about Stripe’s API and how to use Stripe to your favour without spending hours figuring things out through their documentation.
Let’s begin.
Starting From A Blank Page
The first thing we have to do is start a new Astro project. Luckily, Astro makes it easy for us with the following command.
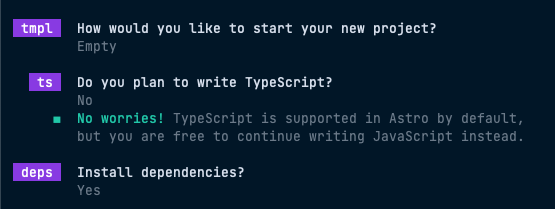
npm create astro@latestWe’re going to:
- Select the empty template
- Say “No” to TypeScript
- and install dependencies
These settings make it easy for everyone who’s following this tutorial.

Deciding how you want to set up Stripe
At this point, you have to decide how you wish to set up Stripe.
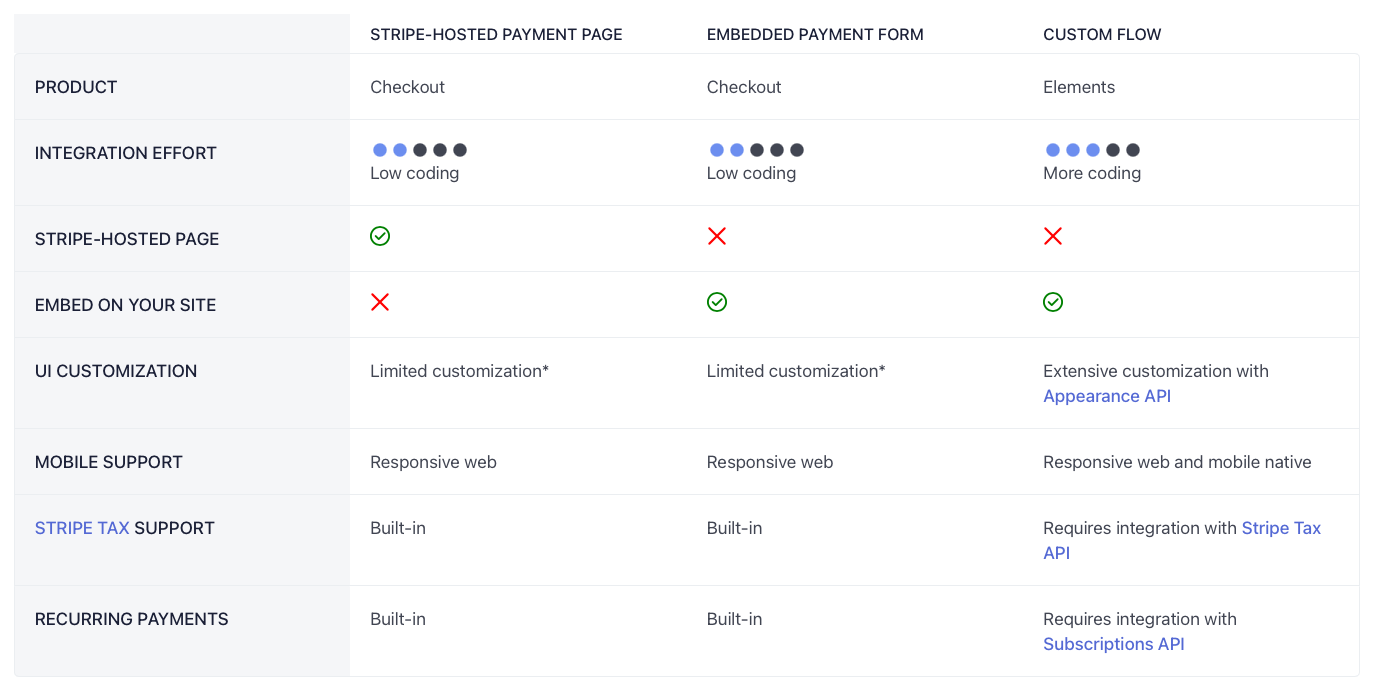
You have 3 options to choose from:
- Use A Stripe-hosted checkout page
- Use an Embedded form
- Custom flow with Stripe Elements

Option 1: Use a Stripe-hosted checkout page — this is the easiest option because you don’t have to write any code. But it makes marketing-related tracking needs a tad more complex since you cannot add 3rd-party scripts to a Stripe-hosted checkout page. (You can host it on your own domain for $10 a month, but why waste money?).
Option 2: Use an Embedded form — this uses the standard Stripe checkout experience on your website. It is the easiest method that also lets you do tracking and almost everything you need.
Option 3: Custom flow with Stripe Elements — this lets you customize the checkout experience further, but it requires you to write code for advanced use cases like Tax calculation and Subscription. This option is also more expensive when compared to option 2. (For example, Tax calculation only begins to make monetary sense when your price is >= $100).
We’re going to use the second option.
You can find a demo and the source code later in this guide.
Creating the Stripe Checkout Experience on Astro
To create the checkout experience, you need to create two pages: (Of course, you can name them anything you wish).
checkout.astro— this page hosts the checkout form.return.astro— this is where Stripe will redirect your users after they have paid.

Building The Checkout Form
The first thing we have to do here is load Stripe.js (the checkout form script). Stripe recommends we load this script directly from Stripe to remain PCI compliant.
<script src="https://js.stripe.com/v3/"></script>But since we are using Astro (which contains highly advanced tooling built-in by default), we can do things the frameworky-way by installing and loading Stripe via @stripe/stripe-js.
npm install @stripe/stripe-js --saveWe can then load Stripe directly inside a <script> tag. (Make sure you replace STRIPE_PUBLIC_API_KEY with your own API key).
<script> import { loadStripe } from '@stripe/stripe-js'; const stripe = await loadStripe('STRIPE_PUBLIC_API_KEY');</script>Now let’s take a quick look at how Astro handles environment variables.
Environment variables with Astro and Vanilla JS
Astro lets you store environment variables in a .env file. I highly recommend you do this because .env files let you prevent your API keys and secrets from being exposed (provided you .gitignore this file).
The syntax looks like this:
KEY='A Secret Key. This must never be exposed'PUBLIC_KEY='A Public Key. This can be exposed in frontend JS'Add your public Stripe API key to this .env file. Make sure it begins with PUBLIC_ or you won’t be able to retrieve them in frontend frameworks.
# Public stripe keys always begin with pkPUBLIC_STRIPE_KEY='pk_<some-value>'You can now retrieve your API keys with import.meta.env.KEY_NAME. To retrieve your Stripe Public API Key, you can use this:
---const PUBLIC_STRIPE_KEY = import.meta.env.PUBLIC_STRIPE_KEY---Now here’s a funky thing about Astro — you cannot grab the environment variables directly in the <script> tag. (No idea why, presumably because it gets loaded differently from other Astro files and doesn’t directly access Vite).
So you have to put the key into an element, then retrieve it in the <script> tag.
---const PUBLIC_STRIPE_KEY = import.meta.env.PUBLIC_STRIPE_KEY---
<div id="checkout" data-stripe-key={PUBLIC_STRIPE_KEY}></div>
<script>  import { loadStripe } from '@stripe/stripe-js';  const checkoutDiv = document.querySelector('#checkout')  const stripe = await loadStripe(checkoutDiv.dataset.stripeKey);</script>
I say it’s funky because you can get public environment variables directly in frameworks (like Svelte).
<script> // You can pass environment variables to frameworks like Svelte directly const PUBLIC_KEY = import.meta.env.PUBLIC_STRIPE_KEY</script>This is one of the reasons why I like using frameworks over Vanilla JS when working with Astro — it’s generally a more pleasant experience.
I’ve added a guide on using Astro with frameworks at the end of this article. More on this later. Let’s get back to our checkout page.
Mounting the Checkout Form
To mount the checkout form, we need to call initEmbeddedCheckout from stripe which takes in a fetchClientSecret method.
This method needs to return a Stripe Session clientSecret value.
---// ...---
<div id="checkout" data-stripe-key={PUBLIC_STRIPE_KEY}
<script>  // ...  const checkout = await stripe.initEmbeddedCheckout({    async fetchClientSecret() {      // Return a client secret    }  });</script>
This clientSecret value can only created Stripe Session. It requires your Secret Stripe API.
Stripe recommends you create this clientSecret secret by sending an API request to your server. But we can eliminate the round trip if we activate Astro’s Server-Side rendering (SSR) capabilities.
Activating Astro’s SSR Feature
It’s really easy to activate Astro’s SSR capabilities.
First, you need to select an adaptor. This lets Astro generate code for the server you wish to use. The choice of your adaptor doesn’t affect this guide so choose anything you wish to use.
We’re going to use the Node adaptor.
You can install the Node adaptor with the following command
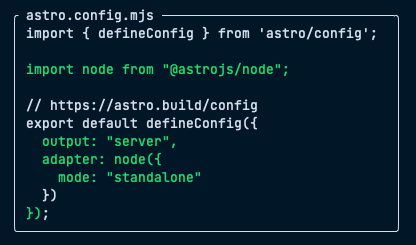
npx astro add nodeWhen you run the command, Astro will also include additional configurations to your astro.config.mjs file.

Personally, I would set output to hybrid because I want most of my pages to be static. Only a subset (like checkout.astro) should be dynamic. I’ll explain more about this in another recipe which I will link to at the end of this article.
We’re done with the SSR setup. Let’s move on.
Generate the Client Secret
Next, we can use Stripe’s Node SDK to create a Stripe session. To do this, we need to install the SDK first.
npm install stripe --saveThen we will add the Stripe secret API key into the .env file:
# Secret Stripe API Keys always begin with skSTRIPE_KEY='sk_<your-stripe-key>'You can now initialize Stripe and call the sessions.create method.
---// ...const stripe = new Stripe(import.meta.env.STRIPE_KEY)const session = await stripe.checkout.sessions.create({  // options here...})---
<!-- ... -->
You need to provide sessions.create with a couple of options. I have detailed them for you so it’s easier to understand what they do.
ui_mode: This should be set toembeddedbecause we’re using embedded forms.mode: Can besetup,paymentorsubscription. Set this topaymentif you’re collecting a one-off fee, orsubscriptionif you’re collecting asubscriptionfee.automatic_tax: This should be set to{ enabled: true }if you want Stripe to collect Tax and remit them to the authorities for you automatically. Before you set this option, make sure you add your Tax registrations to Stripe.return_url: This is where users will return to after they have paid.line_items: Items to be charged.
ui_mode, mode, and automatic_tax values are relatively straightforward so you can add them directly without much explanation.
---// ...const stripe = new Stripe(import.meta.env.STRIPE_KEY)const session = await stripe.checkout.sessions.create({ ui_mode: 'embedded', mode: 'subscription', automatic_tax: { enabled: true },})---<!-- ... -->return_url and line_items require a little bit more explanation so here we go.
Setting the return_url
The return_url specifies where Stripe should redirect your user back after they have finished paying. It must be an absolute URL.
If you’re developing, the URL will probably start with http://localhost, but it would be https://yoursite.com in production. You cannot hardcode a value here because of this.
The easiest way to set the correct value here is to use Astro.url. To do this, you need to set the site variable in astro.config.mjs.
export default defineConfig({ site: 'https://www.my-site.com',})Once this is done, you can retrieve the origin with Astro.url.
---// ...// This gives 'http://localhost:port' in dev and 'https://yoursite.com' in productionconst { origin } = Astro.url---You can then use this origin in return_url.
---// ...const stripe = new Stripe(import.meta.env.STRIPE_KEY)const session = await stripe.checkout.sessions.create({ ui_mode: 'embedded', mode: 'subscription', automatic_tax: { enabled: true }, return_url: `${origin}/return/session_id={CHECKOUT_SESSION_ID}`})---<!-- ... -->{CHECKOUT_SESSION_ID} value untouched in the return_url. Stripe would replace this value with the actual session ID on the return page.Setting Line Items
Whenever mode is set to payment or subscription, you need to provide sessions.create with a line_items value. This is an array of items that contain two pieces of information each:
- The price ID
- The quantity
The price ID can be retrieved from your Product page. Feel free to create a Product and add some prices if you haven’t done it yet.
Once you are done, you should be able to see your price_ids here:

Select the IDs for the price you wish to charge your customer (for the checkout) and put them into an array as follows:
const session = await stripe.checkout.sessions.create({ // ... line_items: [ { price: 'YOUR_PRICE_ID', quantity: 1, }, ],})Return to mount the Checkout Form
We’ve done a lot! The next step is to pass the clientSecret from this session into the fetchClientSecret.
With our setup, we can pass clientSecret into the HTML as a data variable, retrieve it in the <script> tag, and return it in fetchClientSecret.
---// ...const session = await stripe.checkout.sessions.create({  // ...})---
<!-- Add client_secret as a data variable --><div id="checkout" data-stripe-key={PUBLIC_STRIPE_KEY} data-client-secret={session.client_secret}> </div>
<script>  import { loadStripe } from '@stripe/stripe-js';  const checkoutDiv = document.querySelector('#checkout')
  // Get `clientSecret` from the element  const { clientSecret, stripeKey } = checkoutDiv.dataset  const stripe = await loadStripe(stripeKey);
  // Return it in `fetchClientSecret`  const checkout = await stripe.initEmbeddedCheckout({    async fetchClientSecret: () => clientSecret  });</script>
Now you can mount the checkout form with checkout.mount. Here, you have to provide the selector for the checkout div again.
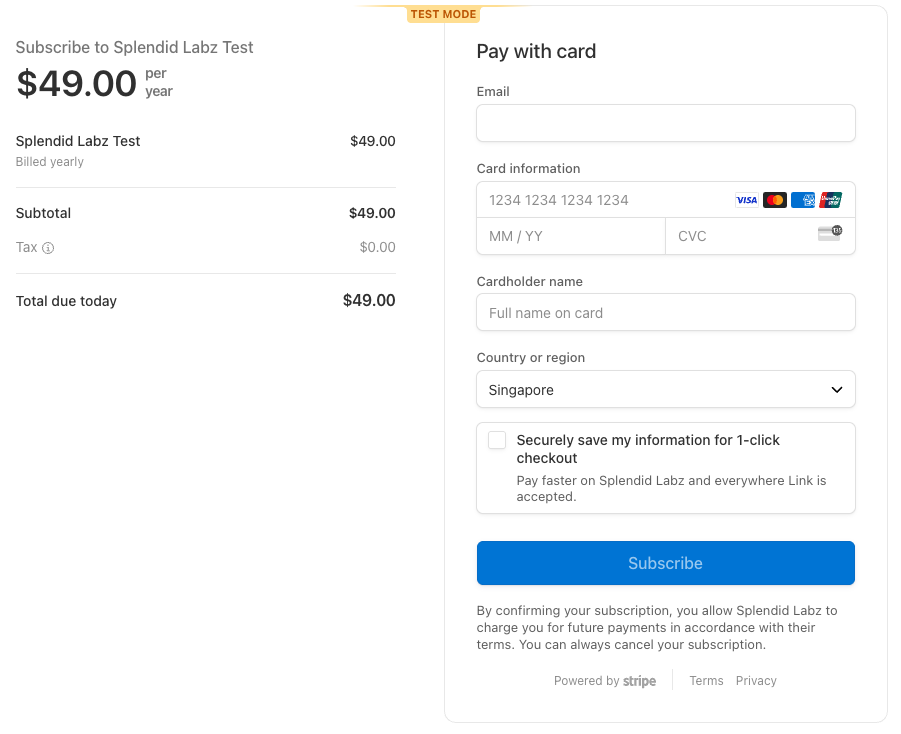
---// ...---<!-- ... --><script> // ... checkout.mount('#checkout');</script>At this point, you should be able to see your checkout form when you navigate to checkout.astro.

If you set output to hybrid when activating SSR, you also need to set prerender to false for this page. Doing so ensures checkout.astro is not statically generated, which means sessions.create would create a new value for each visit.
---export const pretender = false---Next, we have to handle what the user sees when Stripe directs them back to the return_url.
Handling The Return Page
Stripe returns the checkout session ID in the URL on the return page.

You can use this value to retrieve the Stripe’s session, and subsequently, use it to determine what to show to users.
To do this, Stripe’s official guides suggest you:
- Send an API to your server
- Retrieve the session object
- Update the DOM
Luckily, Astro makes things easier with SSR — we can retrieve the session information directly in return.astro before generating the page.
This means we have to set prerender to false (if you have set output to hybrid).
---export const prerender = false---Next, we have to retrieve the session ID from the URL. We can do this with Astro.url.
---// ...const sessionID = Astro.url.searchParams.get('session_id')---Once we have the session ID, we can get the session information from stripe.sessions.
---import Stripe from 'stripe'const stripe = new Stripe(import.meta.env.STRIPE_KEY)const session = await stripe.checkout.sessions.retrieve(sessionID)---From the session object, we can retrieve the user’s information like name and email and output them into the HTML.
---// ...
const { name, email } = session.customer_details---<div>  <h1>Thank you for your purchase, {name}!</h1>  <p>We've sent a receipt to {email}.</p></div>
Handling unauthorized access
If the URL doesn’t contain a sessionID value, or if the sessionID value has been changed, Stripe will throw an error in sessions.retrieve. The simplest way to handle this error is to redirect users back to the checkout page.
---let sessiontry { session = await stripe.checkout.sessions.retrieve(sessionID)} catch (e) { // Redirect users back to checkout page if session is invalid return Astro.redirect('/checkout')}---That’s it for this recipe!
Get the code
You can download the code for this recipe from Github. Alternatively, you can also find a working example on StackBlitz.
Either way, just make sure you fill in your Stripe API keys for the code to work!
Additional recipes you may love
There are a couple more things we can do at this point, such as:
- Use Svelte (or any framework) over Vanilla JS
- Send an email after a checkout with Stripe Webhooks
- Send abandon cart emails
- Complete the user registration process after the checkout
- Let users upgrade/downgrade their plans with the click of a button.
These recipes are only available for Magical Dev School subscribers. I’m writing them as we speak and I’ll link them up as soon as I’m done.
Parting words
I hope this tutorial has helped you get started with Stripe — and it will help you build a thriving business!
All the best!
