Setting up a Git Client
Today we’re going to talk about Git. You’re going to learn what is Git and how to setup a Git client on your computer.
What is Git?
Imagine you’re playing a game. In this game, you can create save points. When you die in the game, you will need to load your game and continue from your save point.
If you didn’t create a save point, you will start all the way at the beginning of the game again. That’s not a fun experience, so its always a good idea to save your game.
Git is like a save point system for your work. You can create save points. In Git we call each save point a commit.
When you create a commit in Git, you can load your work from that commit. If you create five commits, you can load your work from any of these commits.
That’s what Git is for. We call it a version control system because you can save and load your work from any commit.
Choosing a Git Client
Many people teach you how to use Git with a command line, but that can be scary for beginners.
We’re going to throw away the command line and use applications to help you get started with Git. These applications are also known as Git clients.
My favorite Git Client is Tower. It is extremely powerful. The only downside to Tower is it costs $55.20 each year. If you’re new to programming, you might not want to start with Tower. You might want to try a free application instead.
Here are some good free apps:
Sourcetree is probably the best free app out there. It is good and has features on par with Tower. But Sourcetree can be buggy, and you might not be able to resolve the errors yourself. (I tried, and I couldn’t).
GitKraken is another popular app that many people like. I believe GitKraken is too fancy and focuses on the wrong things though.
Fork looks clean and simple, and is pretty good to get started with. It’s in beta right now, so its free, but you might need to pay for it later.
I’m going to show you how to setup Fork.
Setting up Fork
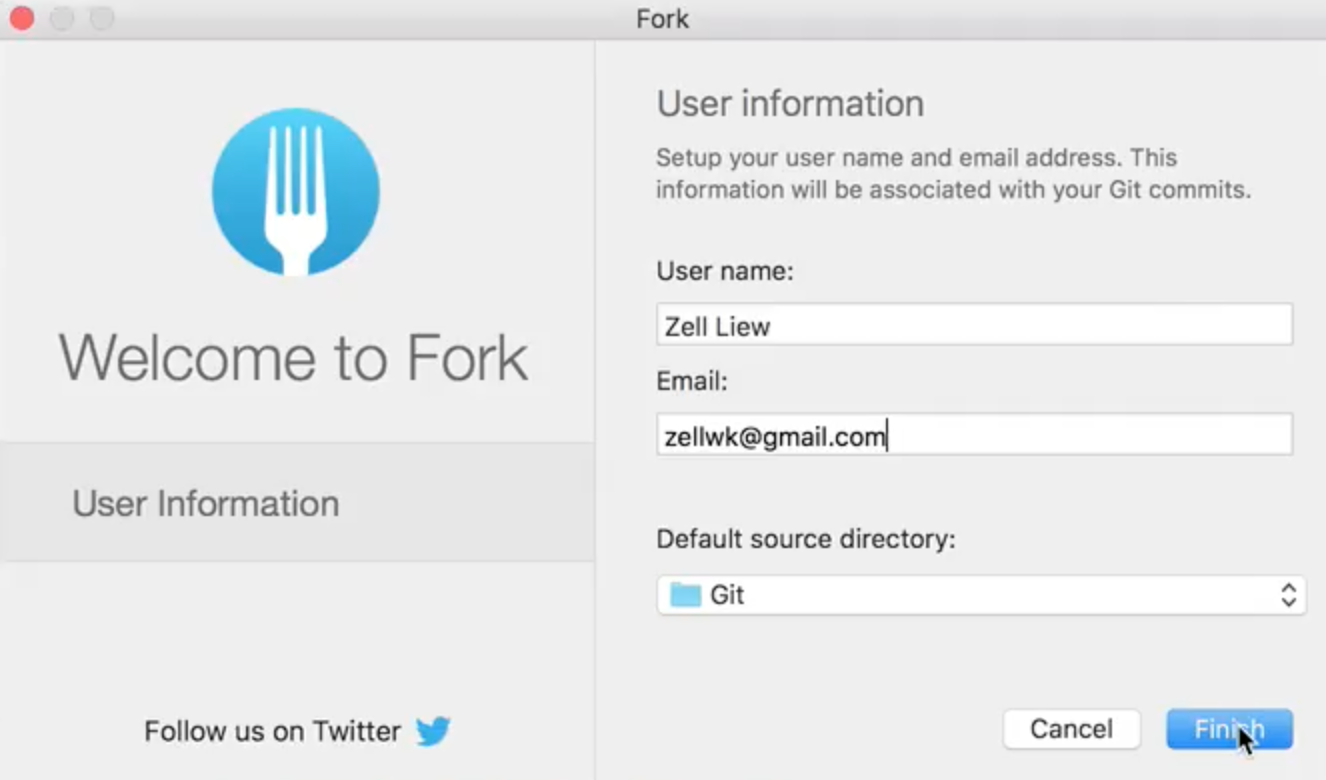
Here’s the Welcome screen when you open up Fork for the first time:

It will ask you for your user name and your email address. These are used for identification purposes for advanced uses when there are multiple people working on the same project.
“User name” is a bit misleading because this should be your name, not an actual username.
The default source directory
Once thing I like about Fork is it asks you to set a default source directory.
This means the projects you copy (or clone) with Git will automatically go into the specified folder, which makes it easy to find.
Initializing a Git repository
There are two ways to create a Git repository.
Before you create a Git repository, you’ll want to create a project folder in your source directory. Once you have a folder in your source directory, you can click on File then Create new repository in Fork to create your Git directory.
To check whether the Git repository is created, you can open up the project folder and check for a .git folder. This .git folder is a hidden folder. You need to show your hidden files to see it.
The second way to initialize a Git repository is through the command line.
To do so, you’d first want to create your project folder in your source directory. Then, you drag your project folder into the Terminal app. This will automatically navigate you to the project folder in the Terminal.
If you want to learn more about the Terminal, I recommend starting with my article on overcoming your fear of the command line.
Once you have navigated yourself to the project folder in the terminal, you can type git init to initialize the repository
git initWrapping up
Git is like a save-point system in games. You can use Git to save and load your work.