Managing your Git branches with Git Flow
How do you manage your git branches if you have many of them? For this, we have a well-known method called the Git flow.
It contains five types of branches:
- The production branch
- The develop branch
- Feature branches
- Release branches
- Hotfix branches
We’ll go into what each type of branches do and how to create them in this lesson.
Let’s start by creating the Git flow.
Initializing a Git Flow
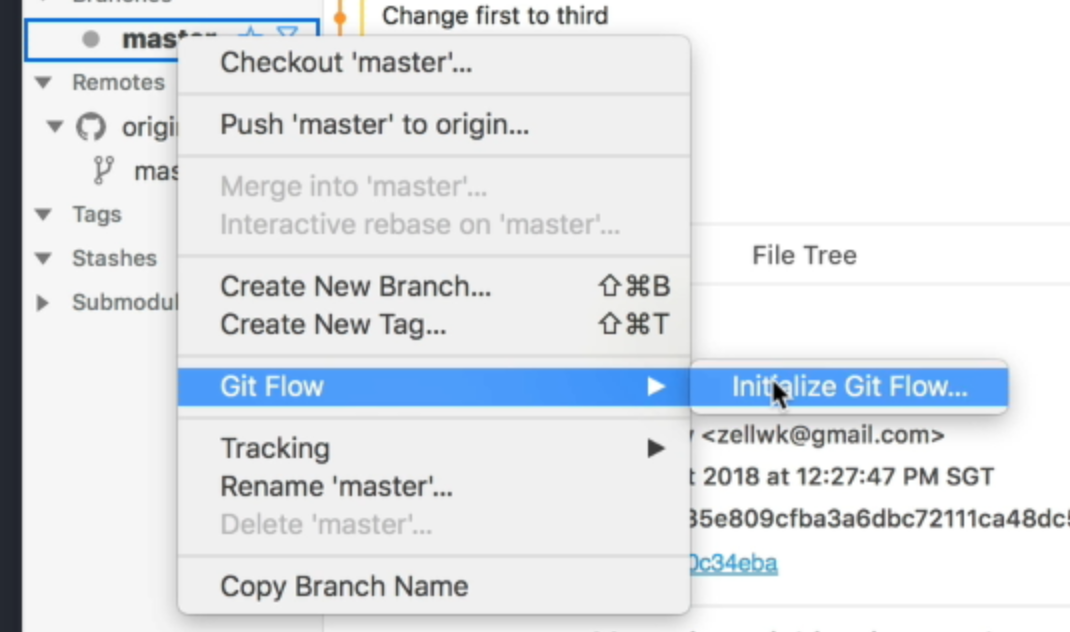
To initialize the Git flow, you go to the left-hand sidebar in Fork and right-click one of your branches. You’ll see a menu called Git Flow. Under Git Flow, you’ll see initialize Git Flow.
Click on it.
Fork will give you a menu. Here, you’ll see the five types of branches I mentioned above, with these settings:
- Production branch:
master - Develop branch:
develop - Feature prefix:
feature/ - Release prefix:
release/ - Hotfix prefix:
hotfix/
You’ll also see a version tag prefix that’s empty.
We’ll talk about what these prefixes are later. For now, let’s go with the defaults and initialize the Git Flow.
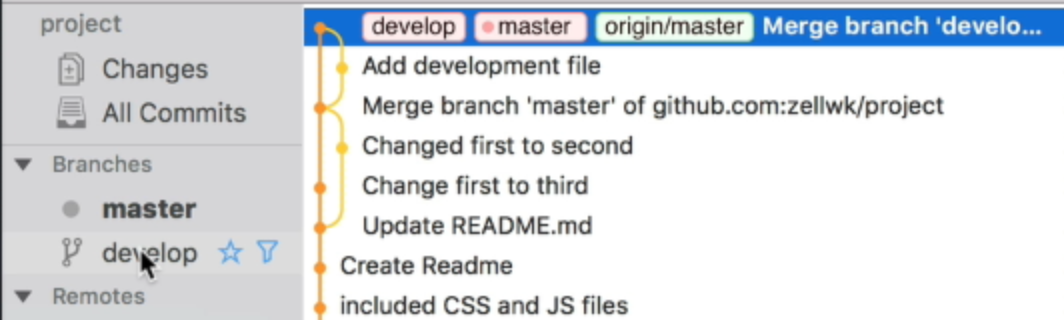
When you initialized Git Flow, Fork will create the develop branch for you.
Production and Development branches
The master branch is used for production purposes. It contains code for the website or application that you show people.
The develop branch is where most of the development work occurs.
We talked about the master branch and the develop branch in the Git branch lesson. You may want to revisit that lesson if you want don’t know what they’re for.
Feature branches
Let’s say you want to refactor your codebase.
A refactor is a big process. You may be afraid to break the develop branch if you code on it directly. And this causes panic.
We don’t want to panic when we code, so we create a separate branch to handle the refatctor. In this case, the refactor is a feature.
Feature branches are almost anything you can think of. If you need to write a chunk of code, you’ll use a feature branch. Examples include adding new things (like a comment system or a dashboard) to your project.
Creating a feature
We start a feature branch from the develop branch. When the feature is completed, we merge it back into the develop branch.
To create a feature, you right-click on any of your branches in the left sidebar, select Git Flow, and select Start Feature.
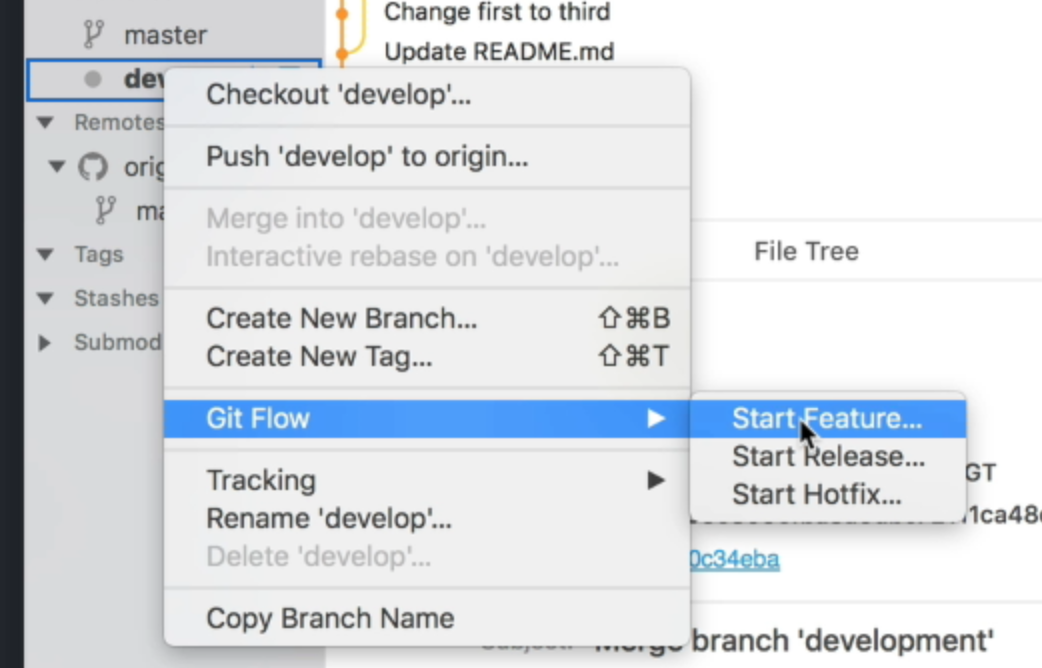
Fork will start the feature from the develop branch for you.
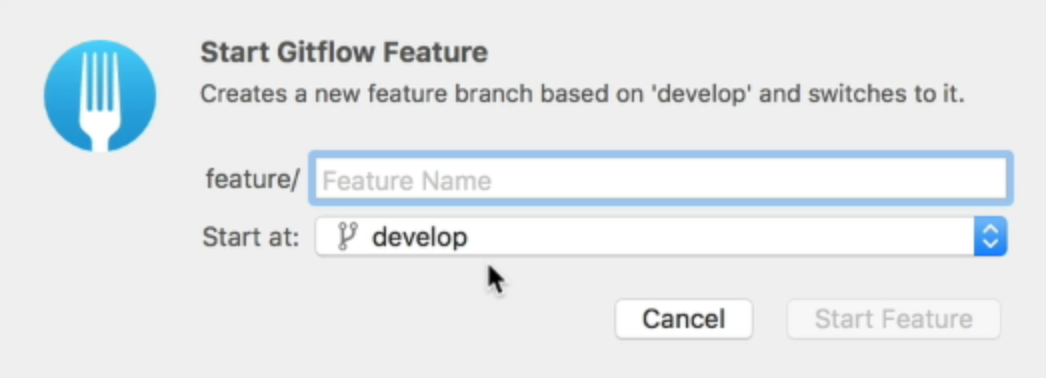
You can name the feature anything you want. I’ll call the feature nav in this example.
Once you click on start feature, you’ll see a folder called feature in the left sidebar. If you open the folder, you’ll see your feature.
This means the prefixes help you organize your branches into folders.
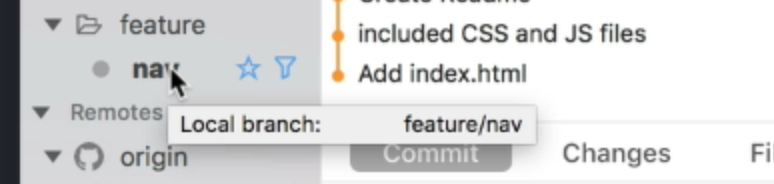
If you look at the Git History, you’ll also see a branch called feature/nav. This tells you that nav is a feature branch.

I’m going to add three links to the project for the nav feature. I’ll set the href for these links as # on purpose. We’ll fix them later with a hotfix.
This code goes into index.html.
<!-- In my index.html file --><nav> <a href="#">Home</a> <a href="#">About</a> <a href="#">Contact</a></nav>After making your changes, you need to commit them to the project. Go to the staging area, stage the files, and create a commit message. Review this lesson if you don’t know how to create a commit.
In this example, I set my commit message to “add nav”. Here’s what the Git history looks like after I committed the code. You’ll see that feature/nav is one commit ahead of everything else:

Ending the feature
You want to merge features back into develop when you’re done. And this is where it gets interesting.
One way to end the feature is to imerge nav into develop ourselves with the method I showed you in the Git branch lesson.
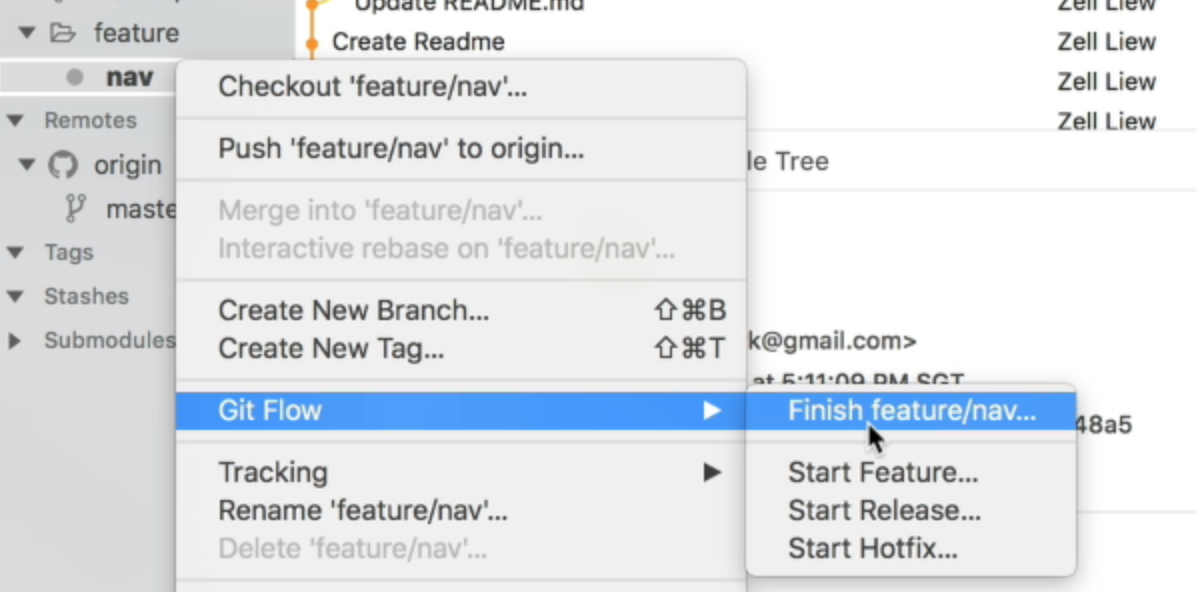
But if you initialized the feature with Git Flow, you can use Git Flow to merge the feature back into develop for you. To do this, you right-click on the feature you want to merge (nav in this case), go under Git Flow, and click on the Finish feature option.
Fork will ask you whether you want to delete your branches. I check it because it helps me keep my branches clean.
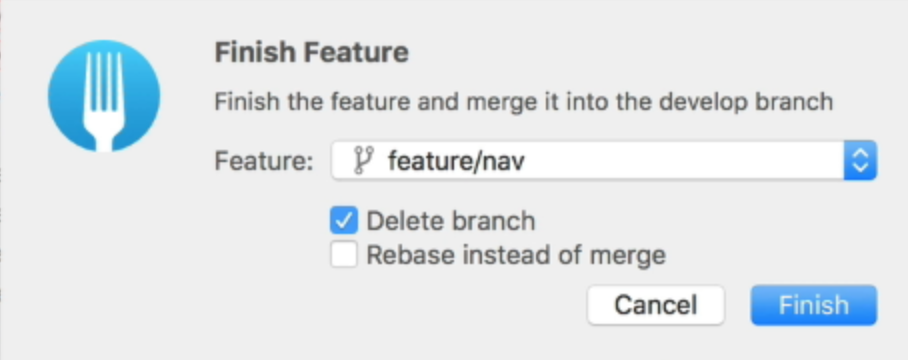
Click on finish and you’ll see the develop branch is now on the add nav commit.

Release branches
When you decide on the features you want to release to your users, you want to fix the bugs for these features.
If you have a big team, you’ll want people to continue creating features as you fix bugs. That’s when a release branch is useful.
Once the bugs are fixed, you’ll merge the release branch into master.
Creating a release
Release branches can be created with Git Flow. To create a release branch, you right-click on any of the branches in the left sidebar, go to Git Flow and select Start Release.
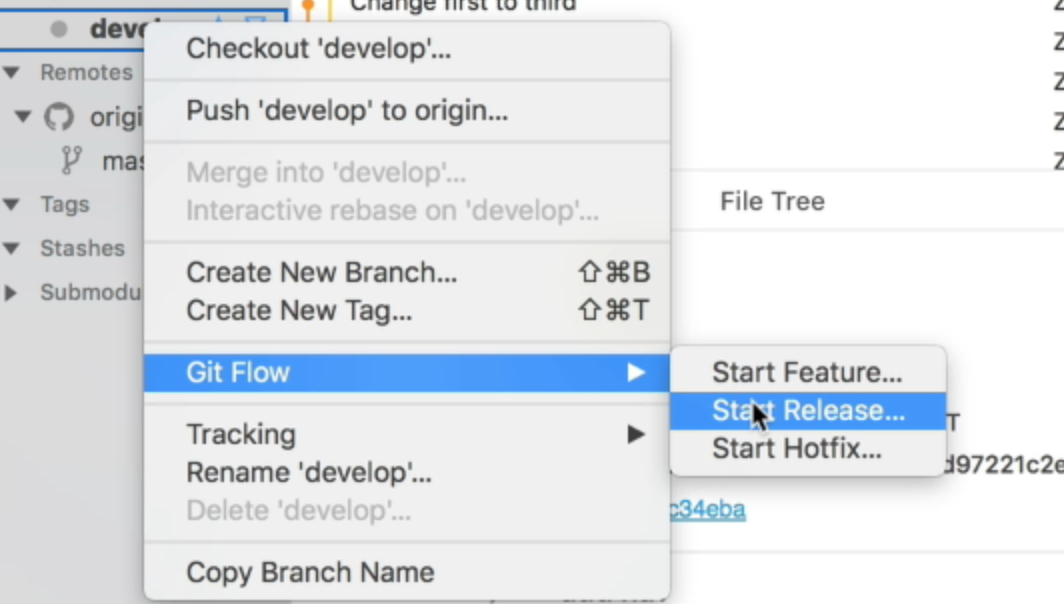
The release branch will also start from develop.
For release branches, we usually use a version as the branch name. This makes it easy for us to go back to an earlier version when we need to. It also makes it easy for users to choose specific versions of our product to use.
Here, we’ll use a version of 1.0.0. I’ll talk about why we use such a version number in a later video.
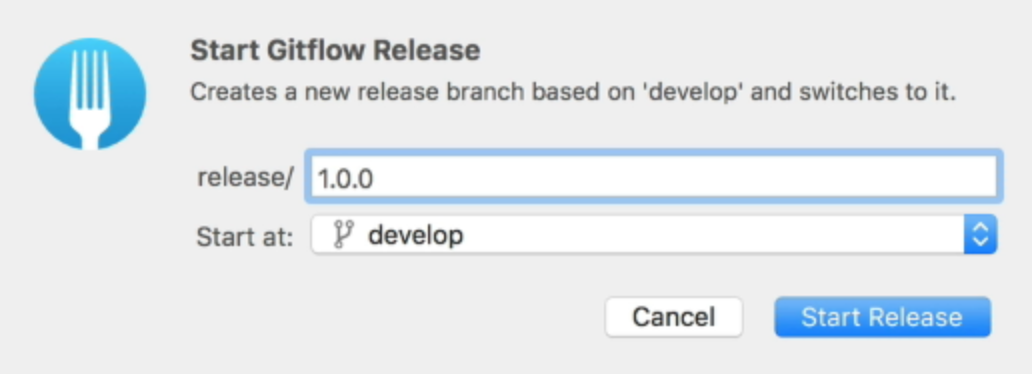
Once you’ve decided on a version number, click on start release and Fork will create a branch for you. It will also create a release folder on the sidebar. This is the same as what you see with a feature.
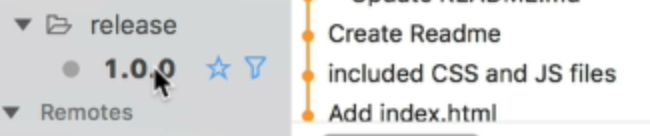
You’ll also see release branch in the Git History.

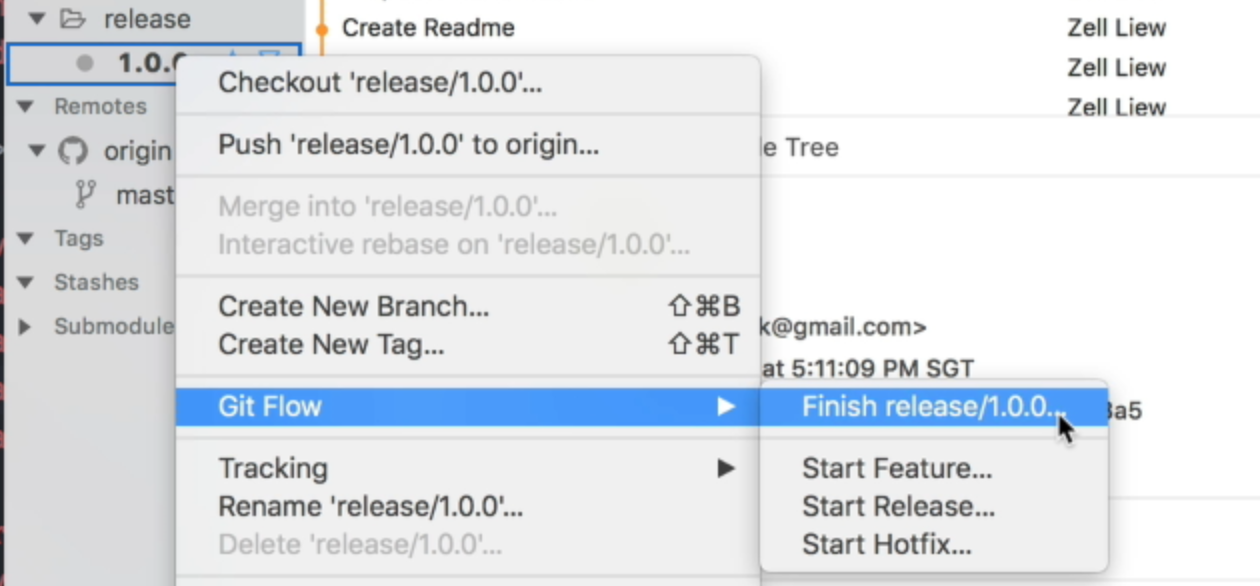
Ending the release
To end the release, right-click on your release branch, go to Git Flow, and select finish release.
Fork will ask you whether you want to delete the branch and back-merge master to develop.
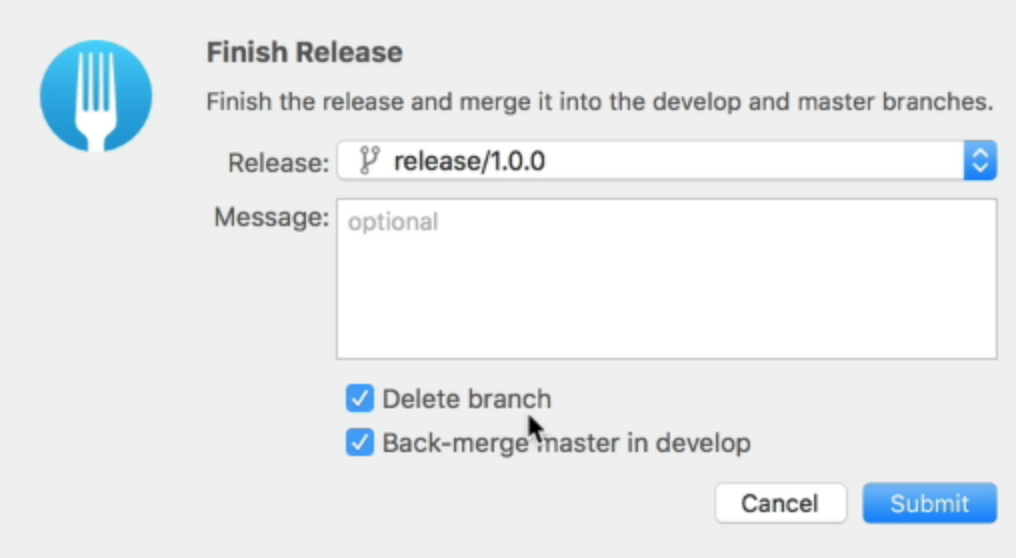
Check both and click on Submit.
You’ll see the Git history change, and it might be complicated. So let’s explain what’s happening.

You’ll see a few things:
release/1.0.0is gone- A
1.0.0takes its place masteris on the same commit as1.0.0developis on a commit that saysMerge tag 1.0.0 into develop
Here’s what’s happened:
- Git Flow creates a tag called
1.0.0to replace the release branch. This keeps track of where the release branch was at before. - It merges the
release/1.0.0branch intomaster. - It deletes the
release/1.0.0branch - It merges
1.0.0intodevelop.
The Git history got complicated because we checked back-merge master into develop when we finished the feature. We check this because we want the develop branch to be updated with the latest bugfixes.
This is just the way it goes. You’ll have to get used to it.
An easier way to visualize things the changes
Atlassian has a good blog post on Git Flow. I’m going to steal their pictures to help explain what’s happening.
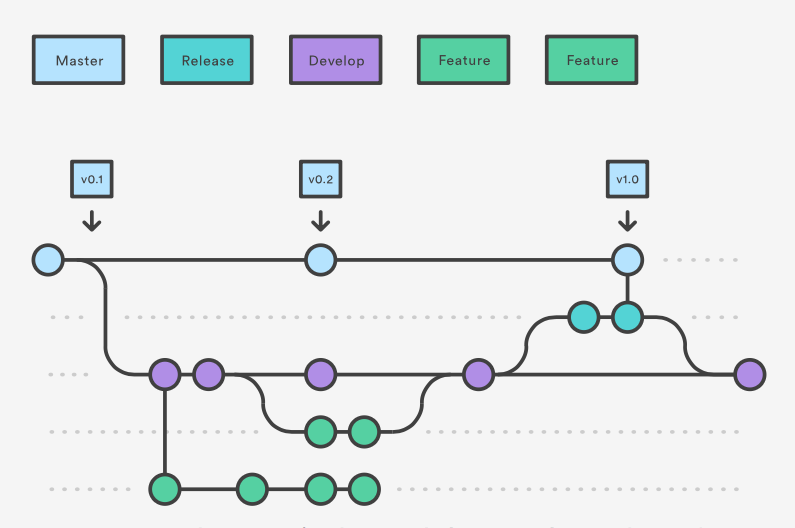
Let me explain what’s going on in this picture.
The horizontal axis is the commit timeline. The earliest commit will be on the left-hand side, and the latest commit will be on the right-hand side.
The two turquoise-looking nodes on the second line are the release commits.
- The
releasebranch will start from thedevelopbranch - You’ll create commits to fix any bugs
- When you’re ready, you push into
master - You also push the changes back into
develop
This picture is much easier to understand compared to the Git History.
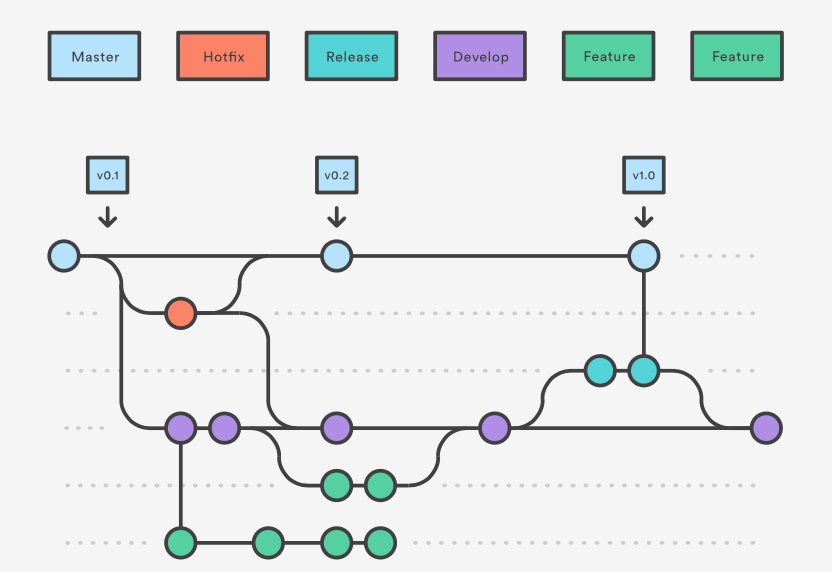
Hotfix branches
The hotfix branch is used when you have a bug on a master branch that you know you can fix quickly.
What you do is:
- Create a branch from
master - Fix the bugs
- Merge in into
master - Merge it into
developat the same time
Here’s the picture from Atlassian on hotfixes:
Creating a hotfix
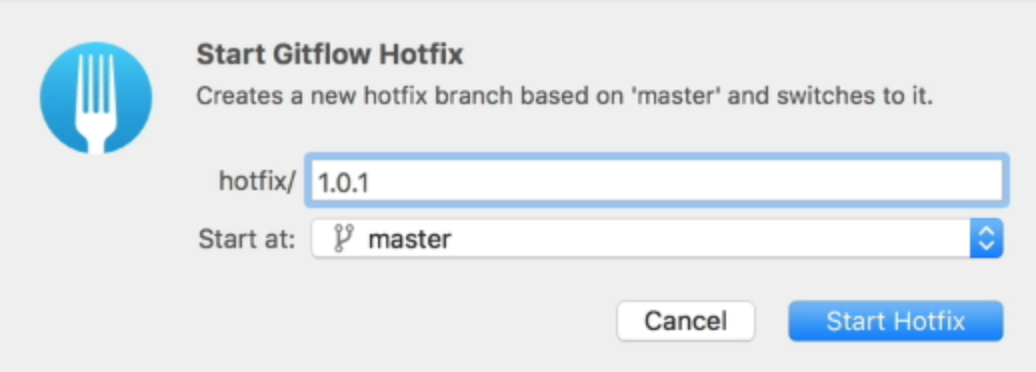
To create a hotfix, you go to the left-hand sidebar, right-click on any of your branches, go to Git Flow and select Start Hotfix.
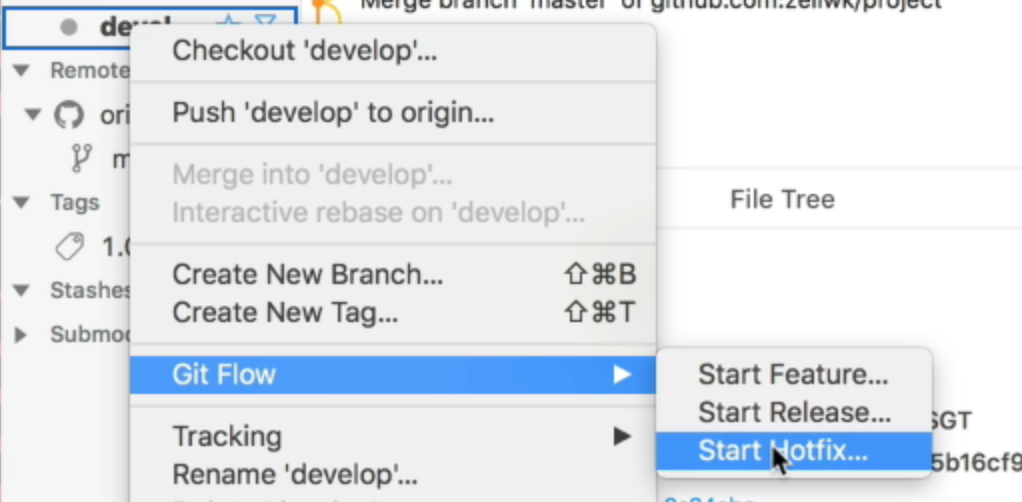
Fork will ask you for the name of your hotfix.
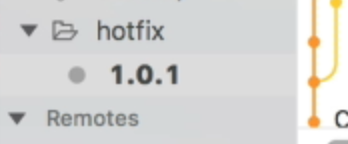
You also create a tag for hotfixes, so you’ll use a version number as well. In this case, I’ll use 1.0.1 as the version number. Once again, we’ll talk about the version numbers in a later lesson.
Click on Start Hotfix, and Git will create a hotfix/1.0.1 branch. You’ll see this in both the Git history and in the sidebar.

Fixing the errors
We’re going to fix the stupid href="#" error we made above.
<!-- In the index.html file --><nav> <a href="https://zellwk.com/">Home</a> <a href="https://zellwk.com/about">About</a> <a href="https://zellwk.com/contact">Contact</a></nav>Once you fixed the error, you have to commit the changes. I’m going to set the commit message to “fix links”.

Finishing the hotfix
To finish the hotfix, you click on the hotfix branch, go to Git Flow, and select finish hotfix.
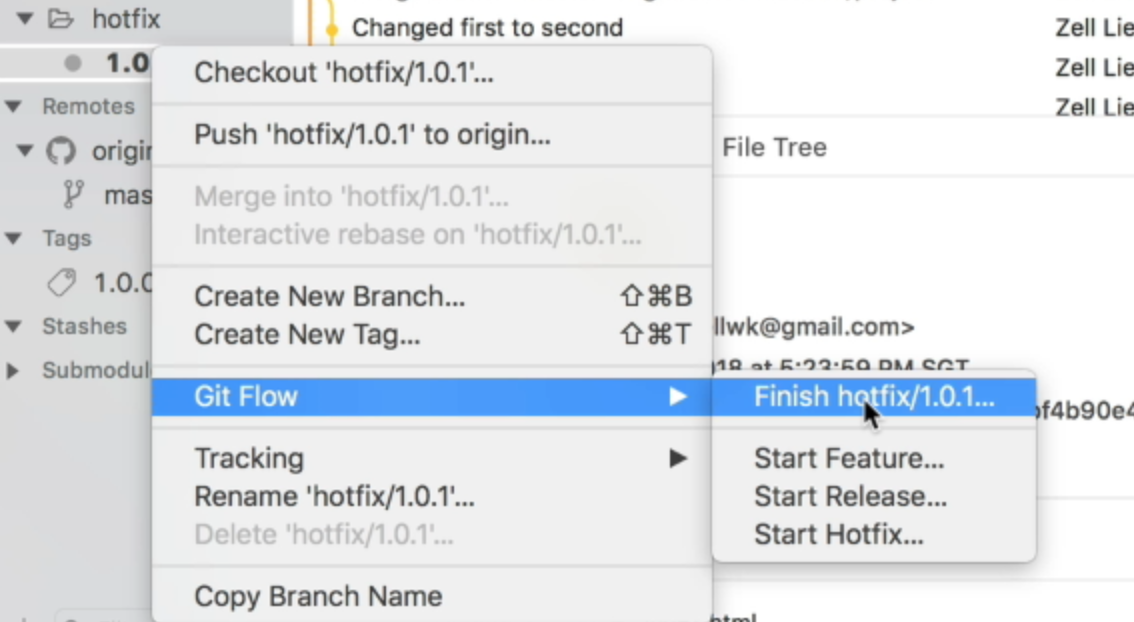
Here, Fork can help you delete the '1.0.1 branch as well. I’ll keep that check to keep my branches clean.

When you finish the branch, the Git history will become a lot more confusing than before.
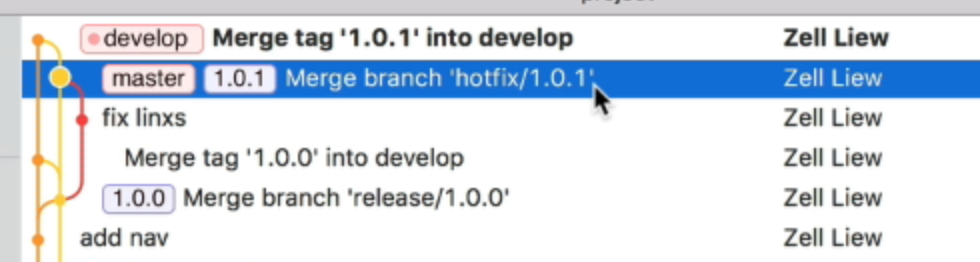
Here’s what has happened:
- Git flow creates a tag called
1.0.1 - It merges
hotfix/1.0.1intomaster - The
hotfix/1.0.1branch gets deleted - It merges
1.0.1todevelop
Do you need to use Git Flow?
Git Flow sounds complicated. Do you need to use it?
My answer is no. I don’t use Git Flow in any of my projects.
Git flow is useful if you have a big team, and you need to run many branches concurrently. For smaller projects (and smaller teams), Git Flow can be an overkill.
I usually use three types of branches:
- A production branch
- A develop branch
- Feature branches
I create feature branches manually. When feature branches are completed, I merge them into the develop branch. Then, I fix bugs on the develop branch. Afterward, I create a tag and merge develop into master.
I do them all manually without using the Git Flow system.
Wrapping up
A Git flow has five types of branches:
- The production branch
- The develop branch
- Feature branches
- Release branches
- Hotfix branches
Whether you use the Git Flow system is up to you. What matters most is you have a way to manage your branches.